1 Introduzione a MS Access 2010, 2013, 2016 e 2019 Tutorial
Benvenuto nel tutorial di MS Access. Questo tutorial è progettato per rendere l'utente attivo e funzionante con MS Access (d'ora in poi semplicemente "Access") in modo rapido. Vengono illustrati i quattro moduli base di Access:Tabelle, Moduli, Report e Query. Viene prima discusso un esempio di business che fornisce uno sfondo per lo sviluppo di un semplice database.
Si presume che gli utenti di questo tutorial siano esperti nel lavorare con Microsoft Windows XP/Vista/Win7/Win10, ecc. e con MS Excel. Ciò include l'uso della tastiera e del mouse. Il tutorial è basato su Microsoft Access che fa parte della suite Microsoft Office Professional che include anche MS Excel, MS Word e MS Powerpoint.
Questo tutorial copre MS Access 2007, 2010, 2013, 2016 e 2019 che hanno un'interfaccia comune (la "barra a nastro" nella parte superiore) che è diversa dalle versioni precedenti. Se sei interessato a lavorare con MS Access '97 o 2000, visita la pagina Web Microsoft Access Tutorial – Copertura di MS Access '97 e 2000.
Il tutorial inizia con una breve panoramica dei database relazionali . La maggior parte dei sistemi di gestione di database in uso oggi si basa su quello che viene chiamato modello di database relazionale. Access è un sistema di gestione di database relazionali. Descriviamo quindi un esempio di business e forniamo uno schema per il database e le applicazioni che desideriamo sviluppare. Nelle sezioni seguenti vengono fornite istruzioni dettagliate per la creazione di tabelle, moduli di immissione dati, report e query per l'applicazione.
1.1 Destinatari
Questo tutorial è destinato agli studenti che hanno appena iniziato con il sistema di gestione del database MS Access.
1.2 Conoscenze prerequisite
Questo tutorial presuppone che lo studente abbia familiarità con il funzionamento di base di un personal computer e Windows 2000, Windows XP, Windows Vista o Windows 7. Le competenze specifiche richieste per questo tutorial sono:
- Utilizzo del mouse e della tastiera
- Aprire e salvare file su disco rigido e su chiavetta USB (chiavetta USB), ad esempio
- Gestione dei file in generale, inclusa la differenza tra lettere di unità, disco rigido, ecc.
- Eseguire programmi dal menu Start di Windows
- Ridurre a icona, massimizzare e ridimensionare le finestre
Lo studente dovrebbe avere a disposizione una chiavetta USB (chiavetta USB) o un altro dispositivo di memoria portatile per archiviare i propri file che verranno creati durante questo tutorial.
1.3 Esecuzione di Microsoft Access su un Apple Mac
Un problema che potrebbe incontrare alcuni studenti è il fatto che MS Access funziona solo con il sistema operativo Windows (come Windows XP, Vista o Windows 7). Se hai un MacBook, un iMac o un altro sistema Apple che esegue MacOS che utilizza una CPU Intel, ci sono alcune possibili alternative che puoi provare. Molti moderni computer Apple che utilizzano CPU Intel possono eseguire il sistema operativo Windows. Tieni presente che per eseguire questa operazione avrai bisogno di una copia con licenza legale del sistema operativo Windows. Ci sono due modi principali per farlo:
- Puoi configurare il tuo Mac su "Dual Boot" sia MacOS X che Windows. Un prodotto che può abilitarlo è il software Apple BootCamp.
- Puoi eseguire il sistema operativo Windows "affiancato" a Mac OS X utilizzando un computer "virtuale" come VirtualBox
Sommario
- 1 Introduzione all'esercitazione su MS Access
- 1.1 Destinatari
- 1.2 Conoscenze prerequisite
- 1.3 Esecuzione di Microsoft Access su un Apple Mac
- 2 Breve panoramica dei database relazionali e delle applicazioni di database
- 3 Un esempio di business
- 4 Avvio di Microsoft Access
- 4.1 Revisione dell'avvio di Microsoft Access
- 5 Creazione e visualizzazione di tabelle
- 5.1 Creazione di una tabella utilizzando la vista Progettazione
- 5.2 Esercizio:Creazione di una tabella
- 5.3 Visualizzazione e aggiunta di dati a una tabella
- 5.4 Esercizio:Aggiunta di dati a una tabella
- 5.5 Creazione di relazioni tra tabelle
- 5.6 Revisione della creazione e visualizzazione delle tabelle
- 6 Creazione ed esecuzione di query
- 6.1 Query su una singola tabella
- 6.2 Esercizio:query su una singola tabella
- 6.3 Query su più tabelle
- 6.4 Esercizio:query multiple su tabelle
- 6.5 Revisione della creazione e dell'esecuzione di query
- 7 Creazione ed esecuzione di moduli di immissione dati
- 7.1 Creazione di un modulo tabella singola utilizzando la procedura guidata
- 7.2 Esercizio:creazione di un modulo tabella singola
- 7.3 Revisione della creazione e dell'esecuzione di un modulo di immissione dati
- 8 Creazione ed esecuzione di rapporti
- 8.1 Creazione di un report tabella singola utilizzando la procedura guidata
- 8.2 Esercizio:creazione di un report a tabella singola
- 8.3 Revisione della creazione e dell'esecuzione di un rapporto
- 9 Creazione ed esecuzione di un modulo principale/dettagli (modulo con modulo secondario)
- 10 Creazione ed esecuzione di un centralino
- 11 Creazione ed esecuzione di un modulo di navigazione
- 11.1 Esercizio:Modifica di un modulo di navigazione
- 11.2 Impostazione del modulo di navigazione come predefinito
- 12 Riepilogo tutorial e argomenti avanzati
La pagina successiva fornisce una breve introduzione ai Database relazionali.
2 Breve panoramica dei database relazionali e delle applicazioni di database
I primi database implementati negli anni '60 e '70 erano basati su file di dati piatti o modelli di dati gerarchici o di rete. Questi metodi di memorizzazione dei dati erano relativamente rigidi a causa della loro struttura rigida e della forte dipendenza dai programmi applicativi per eseguire anche l'elaborazione più di routine.
Alla fine degli anni '70, il modello di database relazionale che ha avuto origine nella comunità di ricerca accademica è diventato disponibile in implementazioni commerciali come IBM DB2 e Oracle. Il modello di dati relazionali specifica i dati archiviati nelle relazioni che hanno alcune relazioni tra questi (da cui il nome relazionale ).
Nei database relazionali come Sybase, MySQL, Oracle, IBM DB2, MS SQL Server e MS Access, i dati vengono archiviati in tabelle composto da una o più colonne (Access chiama una colonna un campo ). I dati archiviati in ciascuna colonna devono essere di un unico tipo di dati come Carattere (a volte chiamato "stringa"), Numero o Data. Una raccolta di valori da ciascuna colonna di una tabella è chiamata record o una riga nella tabella.
Tabelle diverse possono avere la stessa colonna in comune. Questa funzionalità viene utilizzata per specificare in modo esplicito una relazione tra due tabelle. I valori che appaiono nella colonna A di una tabella sono condivisi con un'altra tabella.
Di seguito sono riportati due esempi di tabelle in un database relazionale per una banca locale:
Tabella dei clienti
| ID cliente | Nome | Cognome | Indirizzo stradale | Città | Stato | Zip |
|---|---|---|---|---|---|---|
| Numero | Personaggio | Personaggio | Personaggio | Personaggio | Personaggio | Personaggio |
| 1001 | Giuseppe | Fabio | 123 Lexington | Smithville | KY | 91232 |
| 1002 | Alberta | Jones | Viale Davis 12 | Smithville | KY | 91232 |
| 1003 | Nathanial | Ascia | 443 Grinder Ln. | Broadville | GA | 81992 |
| 1004 | Paolino | Costruttore | 661 Parker Road. | Streetville | GA | 81990 |
Tabella dei conti
| ID cliente | Numero di conto | Tipo di conto | Data di apertura | Equilibrio |
|---|---|---|---|---|
| Numero | Numero | Personaggio | Data | Numero |
| 1001 | 9987 | Controllo | 12/10/1989 | 4000.00 |
| 1001 | 9980 | Risparmio | 12/10/1989 | 2000.00 |
| 1002 | 8811 | Risparmio | 01/05/1992 | 1000.00 |
| 1003 | 4422 | Controllo | 12/01/1994 | 6000,00 |
| 1003 | 4433 | Risparmio | 12/01/1994 | 9000.00 |
| 1004 | 3322 | Risparmio | 22/08/1994 | 500,00 |
| 1004 | 1122 | Controllo | 13/11/1988 | 800.00 |
La tabella Cliente ha 7 colonne (CustomerID, Nome, Cognome, Via, Città, Provincia e CAP) e 4 righe (o record) di dati. La tabella Account ha 5 colonne (CustomerID, AccountNumber, AccountType, DateOpened e Balance) con 7 righe di dati.
Ciascuna delle colonne è conforme a uno dei tre tipi di dati di base :Carattere, Numero o Data. Il tipo di dati per una colonna indica il tipo di valori di dati che possono essere archiviati in quella colonna.
- Numero – può memorizzare solo numeri, possibilmente con un punto decimale. Può essere positivo o negativo.
- Carattere:può memorizzare numeri, lettere e segni di punteggiatura. Access chiama questo tipo di dati Testo .
- Data:può memorizzare solo dati di data e ora.
In alcune implementazioni di database esistono altri tipi di dati come Immagini (per immagini o altri dati). Tuttavia, i tre tipi di dati precedenti sono più comunemente usati.
Si noti che le due tabelle condividono la colonna CustomerID e che i valori della colonna CustomerID nella tabella Customer sono gli stessi della colonna CustomerID nella tabella Account. Questa relazione ci consente di specificare che il Cliente Nathanial Axe ha sia un conto corrente che un conto di risparmio che sono stati entrambi aperti lo stesso giorno:1 dicembre 1994.
Un altro nome dato a tale relazione è Master/Dettaglio . In una relazione principale/dettaglio, un singolo record principale (come Cliente 1003, Nathanial Axe) può avere molti record dettagli (i due account) associati.
In una relazione principale/dettaglio, è possibile che un record principale esista senza dettagli. Tuttavia, è impossibile avere un record di dettaglio senza un record principale corrispondente. Ad esempio, un Cliente potrebbe non disporre necessariamente di alcuna informazione sull'account. Tuttavia, tutte le informazioni sull'account devono essere associato a un unico Cliente.
Ogni tabella deve inoltre avere una colonna speciale chiamata Chiave che viene utilizzato per identificare in modo univoco righe o record nella tabella. I valori in una colonna (o colonne) chiave non possono mai essere duplicati. Nelle tabelle precedenti, CustomerID è la chiave per la tabella Customer mentre AccountNumber è la chiave per la tabella Accounts.
3 Un esempio di business
In questa sezione, illustreremo un esempio di business che verrà utilizzato come base per gli esempi durante il tutorial. Nelle organizzazioni, il compito di analizzare l'azienda e determinare la struttura del database appropriata (tabelle e colonne) è in genere svolto da analisti di sistema . Un analista di sistemi raccoglierà informazioni su come opera l'azienda e formerà un modello dei requisiti di conservazione dei dati. Da questo modello, un programmatore di database creerà le tabelle di database e quindi collaborerà con gli sviluppatori di applicazioni per sviluppare il resto dell'applicazione di database.
Per questo tutorial, considereremo una semplice attività bancaria. La banca ha molti clienti che aprono e mantengono uno o più conti. Per ogni Cliente, conserviamo un registro del suo nome e indirizzo. Assegniamo loro anche un CustomerID univoco. Assegniamo questo identificatore univoco sia per comodità che per accuratezza. È molto più semplice identificare un singolo cliente utilizzando il suo CustomerID piuttosto che cercare il nome completo e l'indirizzo. Inoltre, è possibile che la banca abbia due clienti con lo stesso nome (es. Bill Smith). In questi casi, l'ID cliente univoco può sempre essere utilizzato per distinguerli.
In modo simile, a tutti gli account viene assegnato un numero di account univoco. Un conto può essere un conto corrente o un conto di risparmio. I conti di risparmio guadagnano interessi ma le uniche transazioni consentite sono depositi e prelievi. I conti correnti non guadagnano interessi. Manteniamo la data di apertura del conto. Questo ci aiuta a monitorare i nostri clienti e può essere utile per scopi di marketing. Infine, manteniamo il saldo corrente di un conto.
Nella sezione precedente, abbiamo fornito la struttura e alcuni dati di esempio per la tabella Clienti e la tabella Conti. Questi verranno utilizzati per supportare la parte di archiviazione dei dati della nostra applicazione bancaria.
Applicazioni di database
In qualsiasi applicazione di database, ciascuna delle tabelle richiede un mezzo per ottenere i dati in esse e per recuperare e modificare i dati in un secondo momento. Il modo principale per ottenere i dati nelle tabelle consiste nell'utilizzare i moduli di immissione dati. I modi principali per recuperare i dati dalle tabelle o per visualizzare i dati nelle tabelle consistono nell'utilizzare query o report. In un'applicazione di database completa, tutti i moduli e i rapporti sono collegati tra loro in un modulo di navigazione, una singola pagina che conterrà collegamenti a ciascuna delle parti dell'applicazione. Un'applicazione di database di grandi dimensioni può avere dozzine di moduli e rapporti di immissione dati.
Per questo tutorial creeremo un modulo di inserimento dati per ogni tabella, una query per ogni tabella e un report per ogni tabella.
Nelle sezioni seguenti, introdurremo innanzitutto come avviare Access e come creare un nuovo database.
4 Avvio di Microsoft Access
Come con la maggior parte dei programmi Windows, Access può essere eseguito navigando nel menu Start nell'angolo in basso a sinistra del desktop di Windows.
Per avviare Access, fai clic sul pulsante Start, quindi sul menu Programmi, quindi spostati nel menu di Microsoft Office e infine fai clic sulla voce di menu Microsoft Access. Il menu di MS Office Professional è mostrato di seguito.
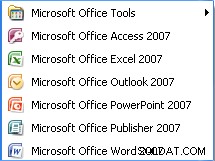
Tieni presente che questa disposizione dei menu può variare a seconda di come è stato installato MS Office sul PC in uso.
Una volta che Access è in esecuzione, verrà visualizzata una schermata iniziale:
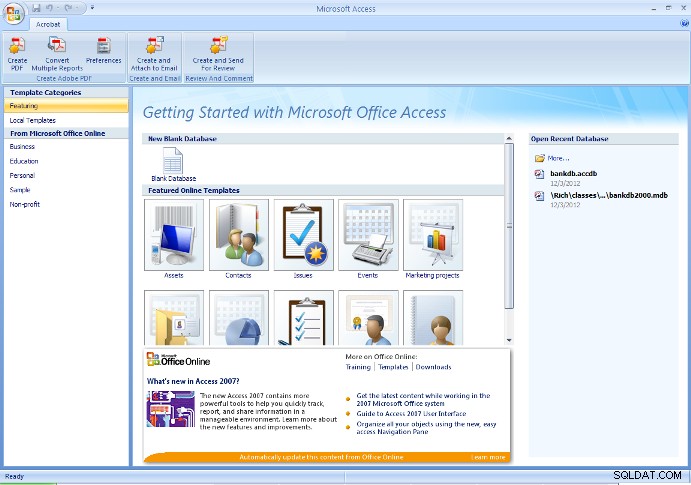
Da questa schermata iniziale, l'utente può creare un nuovo database (vuoto o con alcune tabelle create con la procedura guidata del database), oppure aprire un database esistente.
In generale, la prima volta che si inizia un progetto, dovrebbe essere creato un nuovo database vuoto. Dopodiché, usa Apri database esistente opzione per riaprire il database creato in precedenza.
Avviso – Se in precedenza hai creato un database e poi lo crei di nuovo utilizzando lo stesso nome, sovrascriverai qualsiasi lavoro svolto.
Ai fini di questo tutorial, se stai seguendo questi passaggi per la prima volta, scegli l'opzione per creare un nuovo database vuoto come mostrato nella figura sopra.
In Access 2007, fai clic sul pulsante rotondo Office nell'angolo in alto a sinistra e scegli Nuovo dal menu a discesa. Inserisci Nome file come bankdb.accdb e fare clic sul pulsante Crea per creare il database come nella figura seguente.
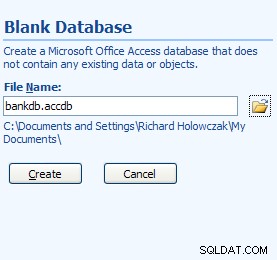
Schermata Nuovo database per Access 2007
Nel nome del file sopra, bankdb è il nome scelto per questo particolare database e .accdb è l'estensione del nome del file data per Microsoft DataBase 2007, file 2010 e 2013.
È consigliabile mantenere il nome del database (bankdb nell'esempio sopra) relativamente breve e non utilizzare spazi o altri segni di punteggiatura nel nome del database. Inoltre, il nome del database dovrebbe riflettere il contenuto del database.
Una volta creato il nuovo database, apparirà la seguente schermata principale di Access:
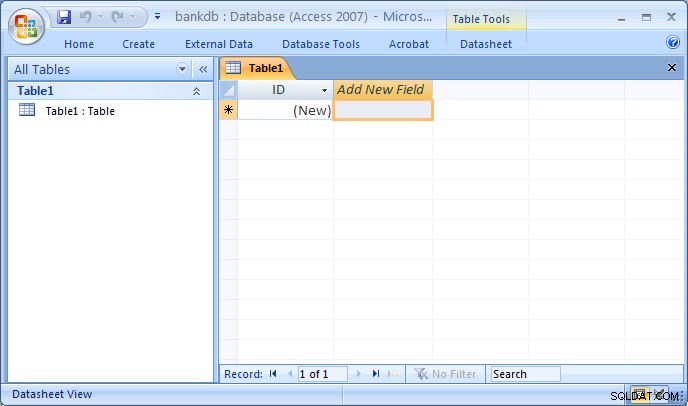
Il layout dello schermo per MS Access 2007 è significativamente diverso dalle versioni precedenti. La maggior parte delle schede nella parte superiore dello schermo sono state riorganizzate. Inoltre, la schermata principale predefinita dopo la creazione di un nuovo database passa automaticamente alla vista Progettazione per creare una nuova tabella.
Le seguenti schede appariranno nella parte superiore dello schermo:
- Scheda Home – Controlli per modificare i caratteri, eseguire query, copiare/incollare/tagliare dati, ecc.
- Crea scheda – Controlli per la creazione di tabelle, moduli, report, ecc.
- Scheda Dati esterni – Controlli per il caricamento dei dati da altre origini dati in MS Access.
- Scheda Strumenti database – Controlli per la gestione delle banche dati (sicurezza, centralino, ecc.)
- Scheda Progettazione – Apparirà durante la progettazione di una nuova tabella, modulo, report, ecc.
Tieni presente che le interfacce per Access 2007, 2010 e 2013 sono tutte simili anche se la versione che utilizzi potrebbe apparire leggermente diversa dalle immagini incluse in questo tutorial.
4.1 Revisione dell'avvio di Microsoft Access
Per avviare Microsoft Access:
- Utilizzare il pulsante Start sulla barra delle applicazioni per aprire:Programmi -> MS Office -> Microsoft Access
- Per creare un nuovo database, scegli Database vuoto e specificare un nuovo nome file per il database. Assicurati di utilizzare un nome descrittivo per il nuovo database. Fare clic sul pulsante OK per creare il nuovo database.
- Per aprire un database esistente, scegli Apri un database esistente , evidenzia Altri file... e fare clic sul pulsante OK. Quindi passare all'unità, evidenziare il file di database esistente sul disco rigido o sull'unità USB e fare nuovamente clic sul pulsante OK per aprire il database.
Per uscire da Access, apri il menu File (o il menu Office) e seleziona la voce di menu Esci.
5 Creazione e visualizzazione di tabelle
Le tabelle sono le principali unità di archiviazione dei dati in Access. Ricordiamo che una tabella è composta da una o più colonne (o campi ) e che una determinata colonna può comparire in più tabelle per indicare una relazione tra le tabelle.
Dall'esempio commerciale discusso in precedenza, abbiamo concluso che due tabelle sarebbero sufficienti per memorizzare i dati sui clienti e i loro Conti bancari . Diamo ora le istruzioni dettagliate per la creazione di queste due tabelle in Access.
Esistono diversi modi per creare una tabella in Access. Access fornisce procedura guidata che guidano l'utente nella creazione di una tabella suggerendo nomi per tabelle e colonne. L'altro modo principale per creare una tabella è utilizzare la Vista Progettazione per definire manualmente le colonne (campi) e i relativi tipi di dati.
Sebbene l'utilizzo delle procedure guidate sia un modo rapido per creare tabelle, l'utente ha meno controllo sui nomi delle colonne (campi) e sui tipi di dati. In questo tutorial, descriveremo i passaggi per creare una tabella utilizzando la Vista Progettazione . Gli studenti sono incoraggiati a sperimentare da soli utilizzando la procedura guidata Crea tabella.
5.1 Creazione di una tabella utilizzando la vista Progettazione
Per creare una tabella in Access utilizzando la visualizzazione struttura, attenersi alla seguente procedura:
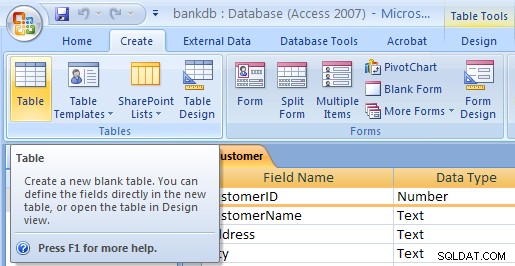
- In Access 2007, 2010 e 2013, la scheda Crea nuova tabella dovrebbe essere già evidenziata e dovrebbe essere creata una nuova tabella denominata table1. In caso contrario, fare clic su Crea scheda e fai clic sulla Tabella icona. Quindi apri la Visualizza menu e scegli Vista Progettazione .

- Apparirà la vista struttura tabella. Inserisci il Nome campo , Tipo di dati e Descrizione per ogni colonna/campo della tabella. Il campo CustomerID è compilato di seguito:
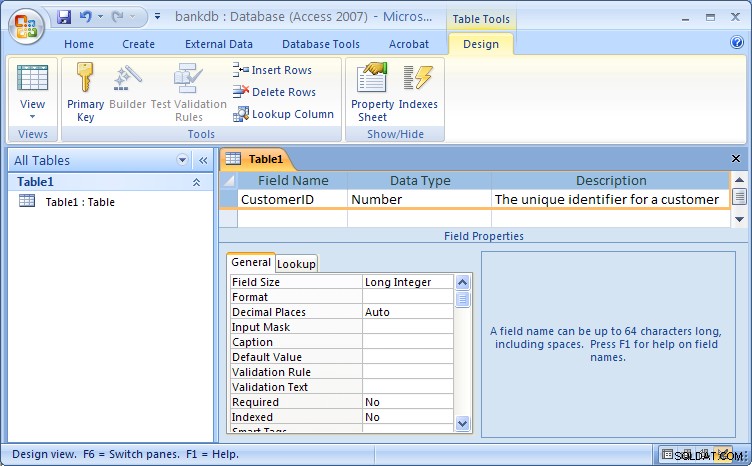
Vista struttura tabella per Access 2007Nota che il nome predefinito assegnato alla tabella è Tabella1 . In un passaggio successivo assegneremo un nome appropriato a questa tabella.
Compila le informazioni per i campi come segue:
Nome del campo Tipo di dati Descrizione ID cliente Numero L'identificatore univoco per un cliente Nome Testo Il nome del cliente Cognome Testo Il cognome del cliente Indirizzo Via Testo L'indirizzo del cliente Città Testo La città del cliente Stato Testo Lo Stato di residenza del Cliente Zip Testo Il CAP del Cliente Di seguito è riportata una figura che mostra la vista di progettazione con la nuova definizione di tabella compilata:

Il passaggio successivo è definire la chiave per la tabella e salvare la tabella.
- Ora che tutti i campi sono stati definiti per la tabella, è necessario definire una chiave primaria. Ricordiamo che la Chiave Primaria verrà utilizzata per identificare univocamente un record nella tabella (in questo caso un Cliente). Evidenzia il ID cliente campo e fare clic sul pulsante Chiave primaria sulla barra dei pulsanti
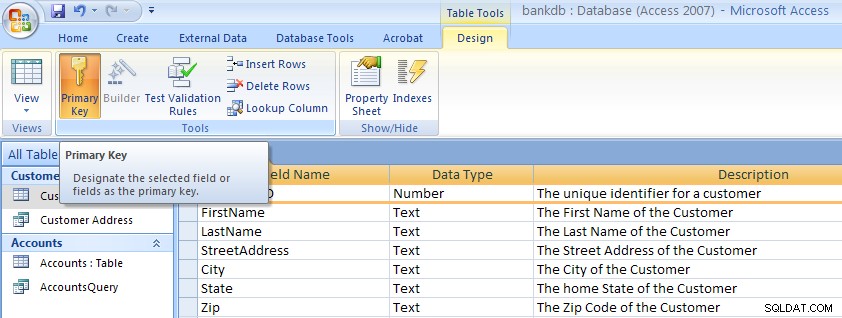 Notare che accanto al nome del campo viene visualizzata una piccola chiave sul lato sinistro.Nota:per rimuovere una chiave primaria , ripeti semplicemente questa procedura per disattivare la chiave primaria.
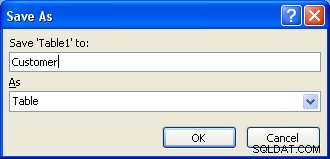
- Come passaggio finale, la tabella deve essere salvata. Apri il menu Office e scegli la voce di menu Salva con nome. Verrà visualizzata una finestra di dialogo in cui è necessario specificare il nome della nuova tabella. Tieni presente che Access fornisce un nome predefinito come Tabella1 o Tabella 2 . Digita semplicemente questo nome predefinito con il nome della tabella. Per questo esempio, dai un nome alla tabella:Cliente Quindi fare clic sul pulsante OK.
A questo punto è stata creata e salvata la nuova tabella Cliente.
Una nota sulla denominazione dei campi (colonne) in MS Access
Quando si definiscono i campi (colonne) per una tabella, è importante utilizzare nomi di campo che forniscano una chiara comprensione del contenuto dei dati della colonna. Ad esempio, il campo CNO indica un Numero Cliente o un Numero Contenitore?
I nomi dei campi in Access possono contenere fino a 64 caratteri e possono contenere spazi. Tuttavia, l'uso di spazi nei nomi dei campi e delle tabelle è fortemente sconsigliato . Se desideri semplificare la lettura dei nomi dei campi, considera l'utilizzo di un carattere di sottolineatura per separare le parole. Tuttavia, assicurati che non vengano visualizzati spazi prima o dopo il carattere di sottolineatura.
La tabella seguente riassume alcuni modi diversi per assegnare i nomi ai campi:
| Descrizione | Cattivo | Bene |
|---|---|---|
| Identificatore univoco per un cliente | CID | CustomerID o Customer_ID |
| Descrizione per un prodotto | PDESC | Descrizione prodotto |
| Numero di telefono di casa del dipendente | Numero_telefono_casa_impiegato | Telefono di casa |
| Numero di conto bancario | BA# | Numero di conto |
5.2 Esercizio:Creazione di una tabella
Crea gli Account tabella seguendo gli stessi passaggi utilizzati per creare la tabella Cliente.
- Fai clic sulla scheda Crea, quindi fai clic sulla Tabella pulsante.
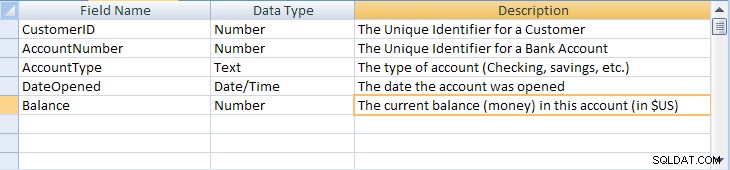
- Apri il menu Visualizza e scegli Design. Apparirà la vista struttura tabella. Inserisci il Nome campo , Tipo di dati e Descrizione per ogni colonna/campo nella tabella Account.
Nome campo Tipo di dati Descrizione ID cliente Numero L'identificatore univoco per un cliente Numero di conto Numero L'identificatore univoco per un conto bancario Tipo di conto Testo Il tipo di conto (assegno, risparmio, ecc.) Data di apertura Data La data di apertura del conto Equilibrio Numero Il saldo corrente (denaro) in questo conto (in $ USA) Di seguito è riportata una figura che mostra la vista di progettazione con la nuova definizione di tabella compilata:
- Definisci una chiave primaria per la tabella Account. Fai clic sul Numero di conto campo con il Destra pulsante del mouse e scegli Chiave primaria dal menu a comparsa.
- Salva la nuova tabella Account aprendo il menu File e scegliendo la voce di menu Salva. Inserisci il nome della tabella:Account Quindi fare clic sul pulsante OK.
Si noti che è possibile eseguire numerosi passaggi aggiuntivi per migliorare e abbellire le tabelle in MS Access, tra cui la specifica dei valori predefiniti, la creazione di valori di ricerca e il mascheramento degli input di dati per seguire uno schema specifico. I dettagli non sono importanti per questo tutorial attuale, ma se sei interessato, controlla la pagina Advanced MS Access Table Design collegata qui.
5.3 Visualizzazione e aggiunta di dati a una tabella
I dati possono essere aggiunti, eliminati o modificati nelle tabelle utilizzando una semplice visualizzazione simile a un foglio di calcolo. Per visualizzare questa visualizzazione dei dati di una singola tabella, evidenziare il nome della tabella e quindi fare doppio clic sul nome della tabella.
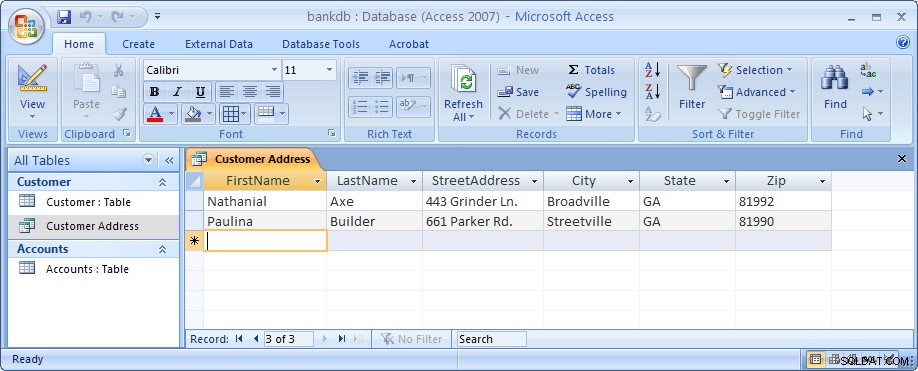
In questa visualizzazione della tabella Cliente, mostrata nella figura seguente, i campi (colonne) vengono visualizzati nella parte superiore della finestra e le righe o i record vengono visualizzati sotto. Questa visualizzazione è simile a come verrebbe progettato un foglio di lavoro.
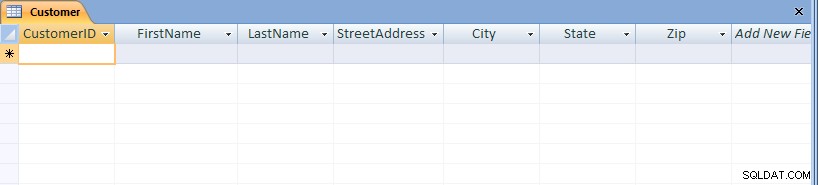
Nota nella parte inferiore della finestra viene visualizzato il numero di record. In questo caso, poiché la tabella è stata appena creata, viene visualizzato un solo record vuoto.
Per aggiungere dati alla tabella, digita semplicemente i valori per ciascuno dei campi (colonne). Premere il tasto Tab per spostarsi tra i campi all'interno di un record. Utilizzare i tasti freccia su e giù per spostarsi tra i record. Inserisci i dati come indicato di seguito:
| ID cliente | Nome | Cognome | Indirizzo Via | Città | Stato | Zip |
|---|---|---|---|---|---|---|
| 1001 | Giuseppe | Fabio | 123 Lexington | Smithville | KY | 91232 |
| 1002 | Alberta | Jones | Viale Davis 12 | Smithville | KY | 91232 |
| 1003 | Nathanial | Ascia | 443 Grinder Ln. | Broadville | GA | 81992 |
| 1004 | Paolino | Costruttore | 661 Parker Road. | Streetville | GA | 81990 |

Per salvare i nuovi dati, apri il menu Office e scegli Salva.
Per passare ad altri record nella tabella, utilizzare la barra di navigazione nella parte inferiore dello schermo:
Per modificare i dati esistenti, vai semplicemente al record di interesse e scheda nel campo appropriato. Usa i tasti freccia e i tasti cancella o backspace per modificare i dati esistenti.
Per eliminare un record, vai prima al record di interesse. Quindi apri il menu Modifica e scegli la voce di menu Elimina.
Per chiudere la tabella e tornare alla schermata principale di Access, apri il menu File e scegli la voce di menu Chiudi.
5.4 Esercizio:aggiunta di dati a una tabella
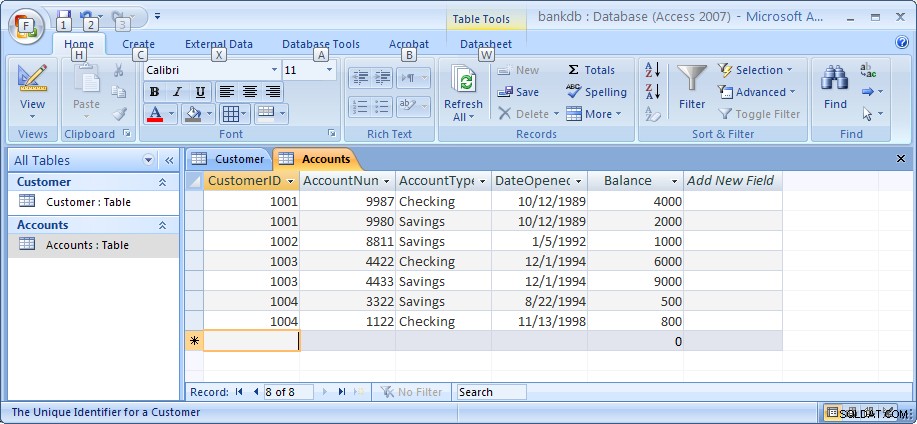
Per questo esercizio, apri la tabella Conti e aggiungi i dati per i sette conti mostrati nella sezione 2. Assicurati di inserire i dati esattamente come mostrato, inclusa la maiuscola dei dati nel campo Tipo di conto. ad esempio, digita Risparmio invece di risparmio o RISPARMIO.
Si noti che quando si inseriscono le date, digitare le quattro cifre complete per l'anno. Per impostazione predefinita, Access mostra tutte e 4 le cifre dell'anno (la versione precedente di Access mostrava solo due cifre).
Assicurati di salvare i dati quando hai finito. La figura seguente mostra la tabella Account e i dati come dovrebbero apparire al termine di questo esercizio.
A questo punto del tutorial, abbiamo creato due tabelle, Clienti e Account, e aggiunto dati a ciascuna. Nelle sezioni successive, illustreremo come interrogare e generare rapporti sui dati nelle tabelle e come creare un modulo di immissione dati intuitivo utilizzando le procedure guidate di Access.
Nota:il mio tutorial su MS Access Advanced Table Design può essere trovato su questo link. Potresti volerlo verificare dopo aver completato il resto di questo tutorial.
5.5 Creazione di relazioni tra tabelle
Ricordiamo che una delle caratteristiche principali dei database relazionali è il fatto che tutte le tabelle sono correlate tra loro. Nel database Banca finora, la tabella Clienti è correlata alla tabella Conti in virtù del campo CustomerID che compare in entrambe le tabelle. Access dispone di un mezzo per rendere esplicita questa relazione utilizzando la schermata Relazioni. Access utilizza queste informazioni durante la progettazione di report, moduli e query che richiedono la visualizzazione di più tabelle.
Per iniziare, assicurati che la tabella Account e la tabella Clienti siano entrambe chiuse. L'accesso interromperà la creazione di eventuali relazioni se la tabella è attualmente aperta. Per chiudere una tabella, fai clic con il pulsante destro del mouse sul nome della tabella nella scheda sopra la tabella e scegli la voce di menu Chiudi, oppure fai clic sulla piccola X a destra sopra la tabella.

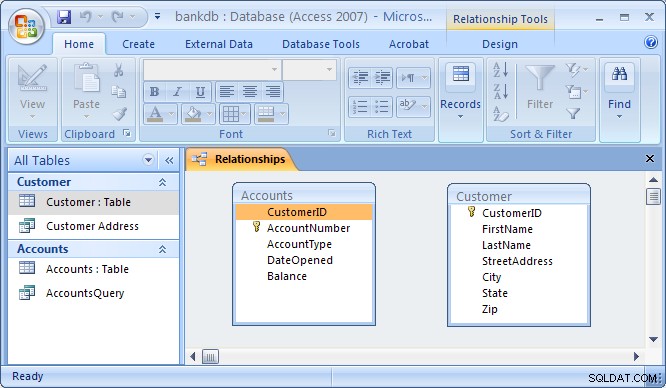
Successivamente, visualizzare la schermata Relazioni facendo clic sulla scheda Strumenti database e quindi fare clic sul pulsante Relazioni come mostrato di seguito. 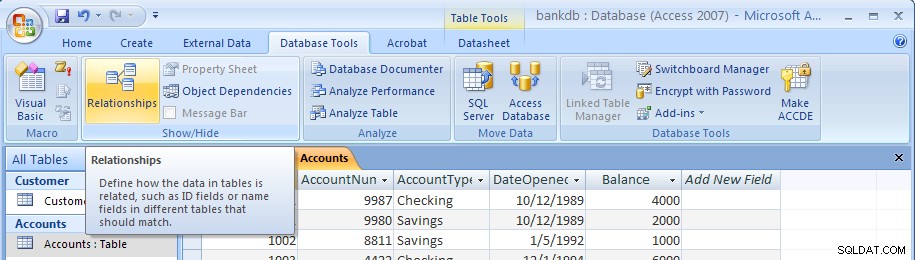
La schermata Relazioni vuota apparirà come segue:
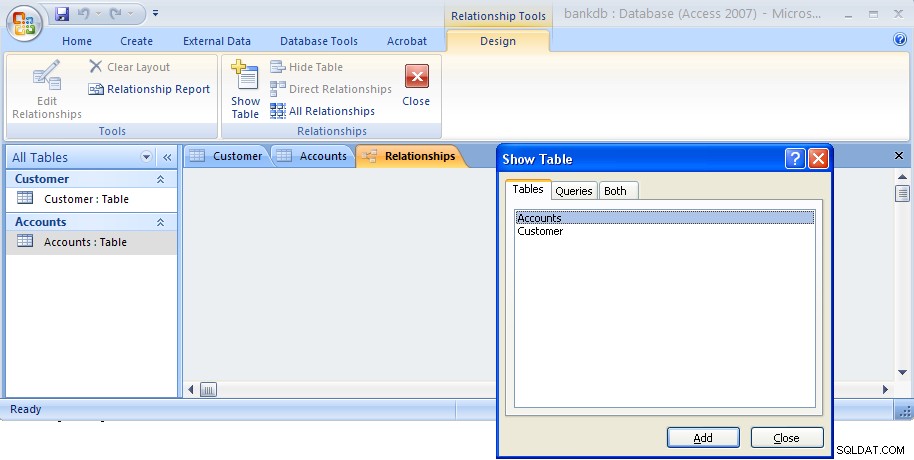
La finestra di dialogo Mostra tabella apparirà per impostazione predefinita. Evidenzia sia la tabella Clienti che la tabella Account come mostrato di seguito, quindi fai clic sul pulsante Aggiungi.

Quindi fare clic sul pulsante Chiudi per chiudere questa finestra di dialogo. La schermata Relazioni ora riapparirà con le due tabelle visualizzate come di seguito:
Per collegare la tabella Clienti con la tabella Account per formare una relazione, fare clic sul campo CustomerID nella tabella Clienti e trascinarlo sopra il campo CustomerID nella tabella Account. Dopo aver rilasciato il pulsante del mouse, la finestra di dialogo Modifica relazioni apparirà come di seguito:
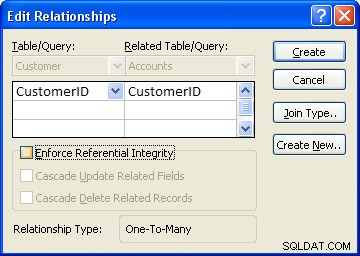
Access farà del suo meglio per determinare il tipo di relazione (quasi sempre selezionerà Uno a molti ). Per questo esempio, Access sa che CustomerID è una chiave della tabella Customer, quindi sceglie questo campo come lato "Uno". This makes the Accounts table the “Many” side as One customer may have Many accounts.
One additional step to be taken is the check off the box labeled “Enforce Referential Integrity”. This option puts constraints into effect such that an Accounts record can not be created without a valid Customer record, and Access will also prevent a user from deleting a Customer record if a related Accounts record exists. At this point, click on the Create button to create the relationship. The Relationships screen should reappear with the new relationship in place as follows:
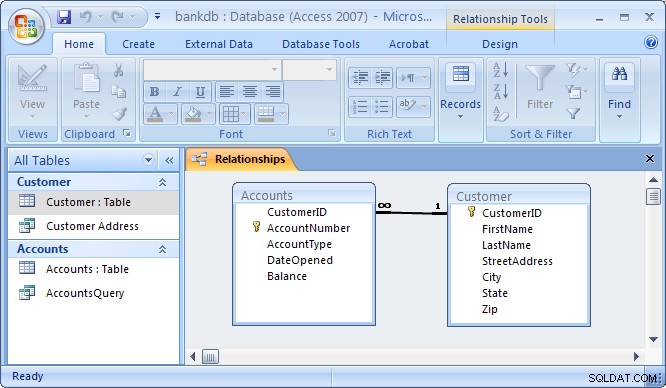
Note the symbols “1” (indicating the “One” side) and the infinity symbol (indicating the “Many” side) on the relationship. Close the relationships screen and select Yes to save the changes to the Relationships layout.
If the relationship does not appear in the above fashion, highlight it and press the delete key to delete it. Then go back to the table design view and make certain that the CustomerID field is designated as the key of the Customers table. Then go back to the Relationships screen and try to recreate the relationship.
5.6 Review of Creating and Viewing Tables
Creating a new table requires the following steps:
- Click on the Tables tab on the Access main screen
- Click on the New button.
- Choose the Design View and click the OK button.
- Fill in the name, data type and description of each of the fields in the table.
- Designate a primary key by clicking on one of the fields with the right mouse button and then choose Primary Key from the pop-up menu.
- Save the table by pulling down the File menu and choosing Save.
- Close the new table by pulling down the File menu and choosing Close.
To change the design of an existing table (e.g., to add, change or delete a field):
- Click on the Tables tab on the Access main screen
- Highlight the name of the table to be modified and click on the Design button.
- Make the necessary changes.
- Save the table by pulling down the File menu and choosing Save.
- Close the table by pulling down the File menu and choosing Close.
To add, delete or change data in an existing table:
- Click on the Tables tab on the Access main screen
- Highlight the name of the table to be modified and click on the Open button.
- Make the necessary changes to the data.
- Save the table data by pulling down the File menu and choosing Save.
- Close the table by pulling down the File menu and choosing Close.
To create or edit relationships between tables:
- Pull down the Tools menu and select the Relationships menu item.
- To display tables, right click and choose Add Tables
- To create new relationships, drag a key field from one table and drop it on the associated field in another table
- To edit an existing relationship, double click on the relationship line.
- To delete an existing relationship, click on the relationship line and press the delete key.
6 Creating and Running Queries
Queries are a fundamental means of accessing and displaying data from tables. Queries can access a single table or multiple tables. Examples of queries for our bank database might include:
- Which Customers live in Georgia ?
- Which Accounts have less than a $500 balance ?
- What is the total amount of money deposited by each Cusomter?
- Which Checking account has the largest balance?
Queries can be used to carry out other tasks such as for creating formatted reports and data entry forms, and for exporting subsets of data to Excel or another software program.
In this section, we show how to use the Access Wizards to create queries for a single table and for multiple tables.
6.1 Single Table Queries
In this section, we demonstrate how to query a single table. Single table queries are useful to gain a view of the data in a table that:
- only displays certain fields (columns) in the output
- sorts the records in a particular order
- performs some statistics on the records such as calculating the sum of data values in a column or counting the number of records, or
- filters the records by showing only those records that match some criteria. For example, show only those bank customers living in GA.
Creating a query can be accomplished by using either the query design view or the Query wizard. In the following example, we will use the query wizard to create a query.
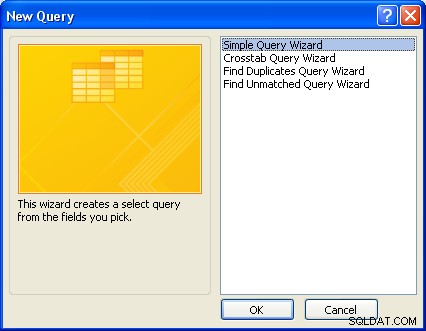
To create a new query, click on the Create tab. Then click on the Query wizard button.
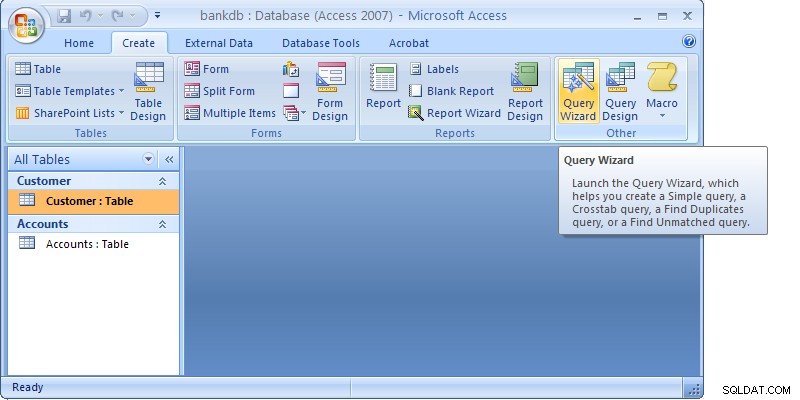
When the Query wizard appears, highlight the Simple Query Wizard selection and click on the OK button.
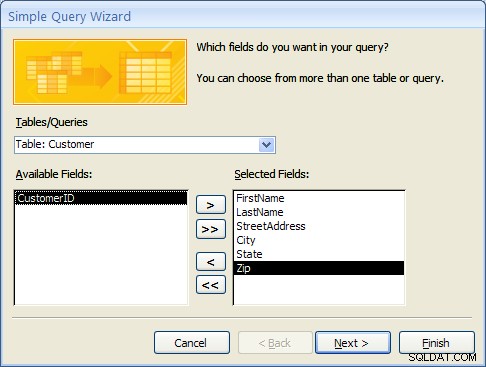
The first step in the Simple Query wizard is to specify the table for the query and which fields (columns) should be displayed in the query output. Three main sections of this step are:
- Tables/Queries – A pick list of tables or queries you have created.
- Available Fields – Those fields from the table that can be displayed.
- Selected Fields – Those fields from the table that will be displayed.
For this example, pull down the Tables/Queries list and choose the Customer table. Notice that the available fields change to list only those fields in the Customer table. This step is shown below:

From the list of Available fields on the left, move the FirstName, LastName, StreetAddress, City and State fields over to the Selected Fields area on the right. Highlight one of the fields and then click on the right arrow button  in the center between the two areas. Repeat this for each of the four fields to be displayed. When done with this step, the wizard should appear as below:
Click on the Next button to move to the next and final step in the Simple Query wizard.
In the final step, give your new query a name. For this example, name the query:Customer Address
At this point, the wizard will create the new query with the option to either:
- Open the query to view information – that is, the wizard will execute the query and show the data.
- Modify the query design – the wizard will switch to the Design View to allow further modification of the query.
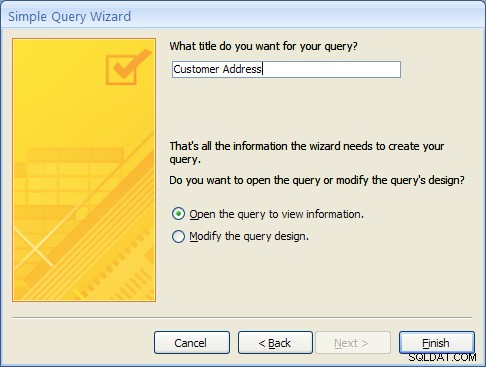
For this example, choose Open the query to view information and click on the Finish button. When this query executes, only the customer’s name, address, city and state fields appear, however, all of the rows appear as shown in the figure below:

Close this query by clicking on the X in the upper right corner of the query results as shown in the figure below:
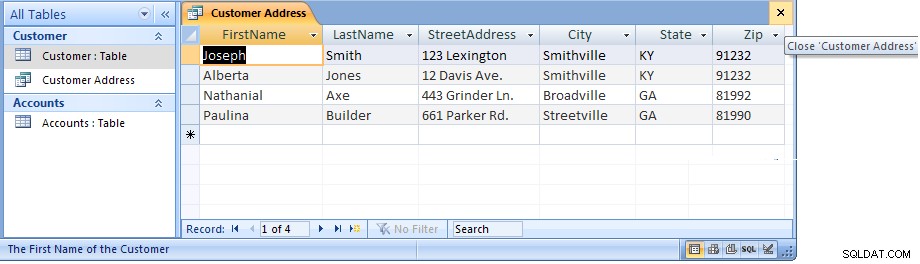
The Access main screen showing the Queries tab should appear. Note the new query Customer Address appears under the Customers table.
6.1 Single Table Queries (Continued)
In the following example, we will modify the Customer Address query to only display customers in a certain state. To accomplish this, we will make use of the Query Design View.
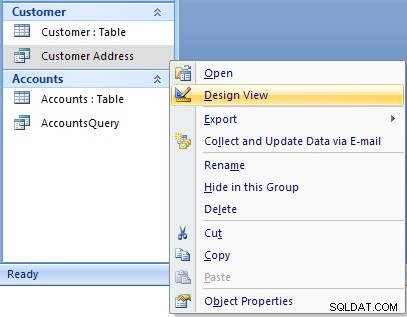
Open up the Customer Address query in the design view by right-clicking on the name of the query. Then select the Design View menu item as shown below.
The design view will appear as in the figure below:
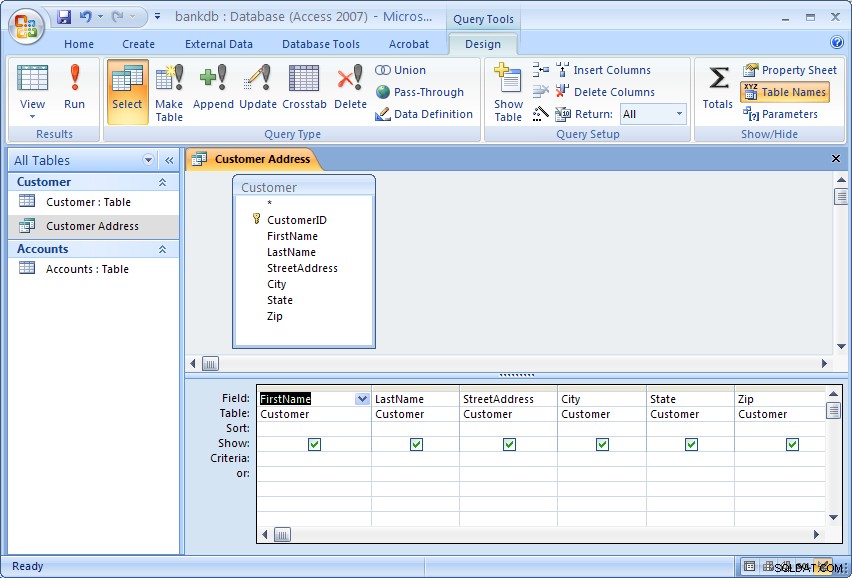
The Query Design view has two major sections. In the top section, the table(s) used for the query are displayed along with the available fields. In the bottom section, those fields that have been selected for use in the query are displayed.
Each field has several options associated with it:
- Field – The name of the field from the table
- Table – The table the field comes from
- Sort – The order in which to sort on this field (Ascending, Descending or Not Sorted)
- Show – Whether or not to display this field in the query output
- Criteria – Indicates how to filter the records in the query output.
For this example, we will filter the records to only display those customers living in the State of Georgia (GA). We will also sort the records on the City field.
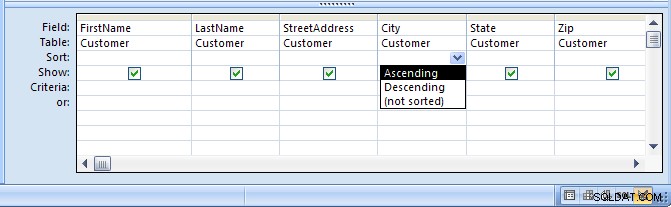
To sort the records on the City field, click in the Sort area beneath the City campo. Choose Ascending from the list as shown in the figure below:
To filter the output to only display Customers in Georgia, click in the Criteria area beneath the State field and type the following statement: ='GA'
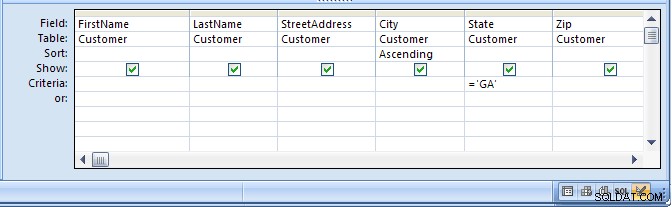
The ='GA' statement tells Access to only show those records where the value of the State field is equal to ‘GA’. Note the use of single quotes to surround the characters.
Run the query by clicking on the Run button (with the large red exclamation point). The output is shown in the figure below:
Finally, save and close this query to return to the Access main screen.
6.2 Exercise:Single Table Queries
For this exercise, use the Simple Query wizard to create a query on the Accounts table showing just the AccountNumber, AccountType and Balance fields.
- From the Access main screen, click on the Create tab. Then click on the Query Wizard button.
- Choose the Simple Query wizard option and click on the OK button.
- Under Table/Queries:choose the Accounts table. Then move the AccountNumber, AccountType and Balance fields over to the Selected fields area. Then click the Next button.
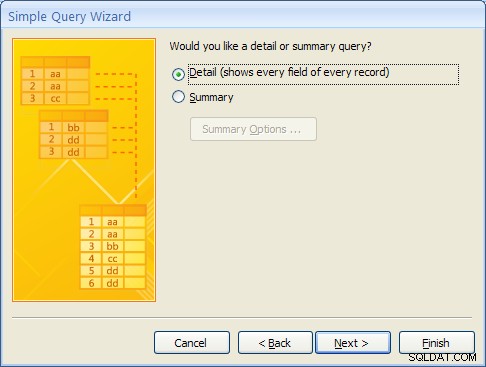
- In the next panel, you will be asked to choose between a detail or summary query. Choose detailed query and click on the Next button.
- Name the new Query :AccountsQuery and click on the Finish button.
The output is shown below:

Close this query by pulling down the Office menu and choosing Close.
In the next part of the exercise, we will modify the query to sort the output on the account number and only display the Savings accounts.
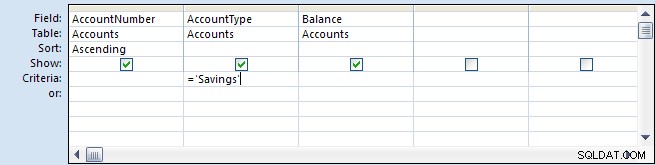
- From the Queries tab on the Access main screen, highlight the AccountsQuery and click on the Design button.
- Change the Sort order for the AccountNumber field to Ascending.Add the following statement to the Criteria:are under the AccountType field:=‘Savings’
- Run the query by double-clicking on the AccountsQuery name. The output is shown below:
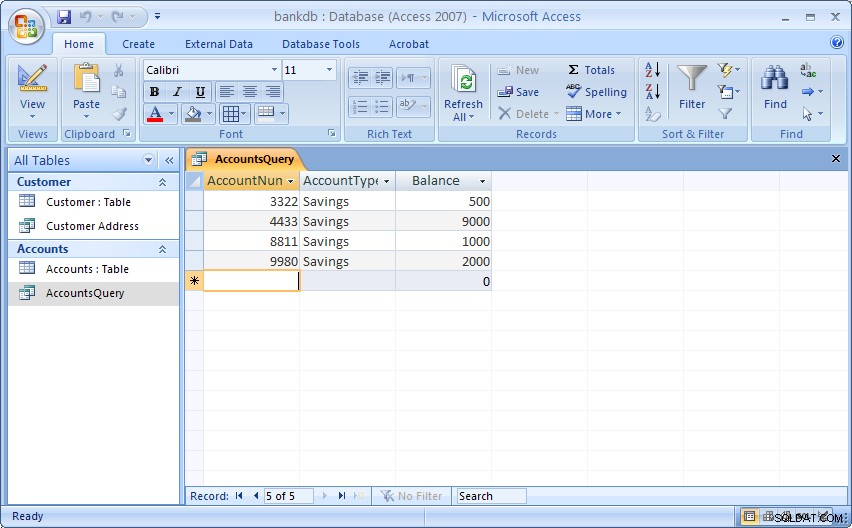
- Finally, save and close the query to return to the Access main screen.
6.3 Multiple Table Queries
Up to this point, queries involving only one table have been demonstrated. It is almost a given that queries will need to involve more than one table. For this example, assume that a manager would like to see a list of all of the customers and the type of account(s) that each one maintains at the bank. Such a query requires data from both the Customers table as well as the Accounts table. In such queries, Access will rely on the Relationships established between tables to guide how the data will be assembled to satisfy the query.
Before proceeding with these next instructions, make certain the One-to-Many relationship between the Customers and Accounts table has been created (see section 5.5 Creating Relationships for a review of this process).
To start the process of creating a multiple table query, highlight the Create tab and click on the Query Wizard button to create a new query. Select the “Simple Query Wizard” option as was done previously.
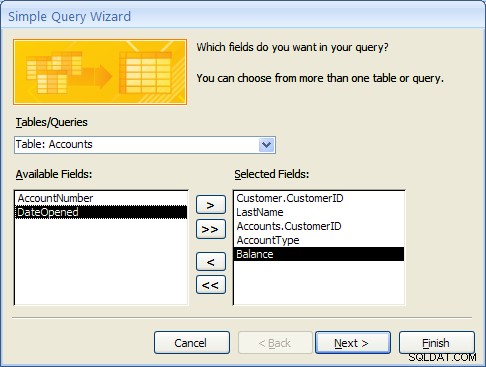
When the simple query wizard appears, select the CustomerID and LastName fields from the Customers table, then switch the Tables/Queries selection to the Accounts table and select the CustomerID, AccountType and Balance fields from the Accounts table. The result from this step is down below:
Click the Next button to continue. In the next step of the wizard, an option will appear to provide some level of Summary. For this example, leave the default at “Detail …” as shown below and then click on the Next button.
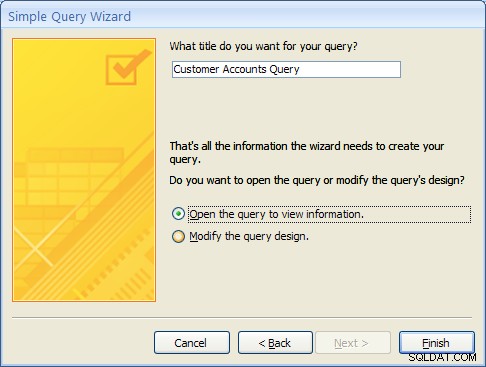
In the final step of the wizard, name the query “Customer Accounts Query” and click on the Finish button. The multiple table query results should appear as follows:
MS Access knows how to line up (or “join”) the accounts table to the Customer table for this query due to the relationship that was created when the tables were first defined.
As with single table queries demonstrated previously, one can change the query definition in design view by adding filters (e.g., show account information for all customers in ‘GA’).
6.4 Exercise:Multiple Table Queries
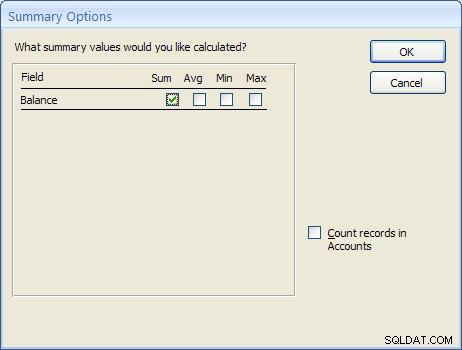
For this exercise, create a new query called “Accounts Summary Query” that joins the Customers table (include the CustomerID and LastName fields) with the Accounts table (include the Balance field only). In the second step of the wizard, click on the Summary choice (instead of Details) and then click on the Summary Options… button. Check off all of the Summary option boxes such as Sum , AVG , Min and Max as shown in the figure below:
The resulting query should appear as follows:
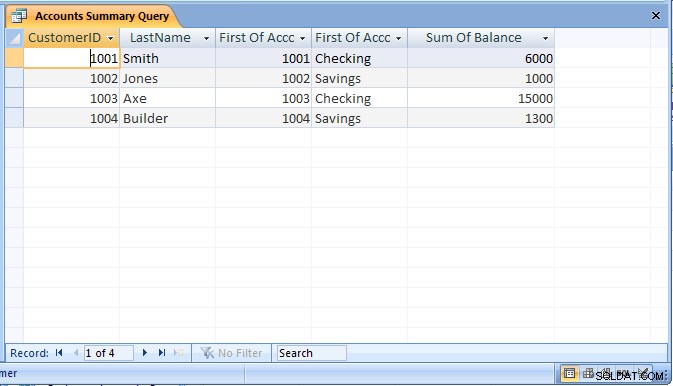
Be sure to save the query as “Accounts Summary Query”.
6.5 Review of Creating and Running Queries
In this section, the basic steps for creating and running queries were introduced. The query wizard can be used to create simple queries that access a single table. It is also possible to then modify the query to sort or filter the records.
Creating a query using the query wizard:
- From the Access main screen, click on the Queries tab. Then click on the New button.
- From the Queries tab on the main Access screen, click on the New button and choose the Simple Query wizard option.
- Under Table/Queries:choose the appropriate table for the query and then indicate which fields in the table will appear in the query output.If querying more than one table, change the Table/Queries:selection to display additional tables and select the necessary fields.
- If the table contains numeric fields, either detailed or summary information may be specified for the query.
- Finally, name the new query and click on the Finish button.
As a final note, Forms and Reports can be created based on existing queries.
7 Creating and Running a Data Entry Form
Data entry forms are the primary means of entering data into tables in the database. In a previous section, we described how to add data to a table using a spreadsheet-like view of the data. Data entry forms offer a more user-friendly interface by adding labels for each field and other helpful information.
Access provides several different ways of creating data entry forms. These include:
- Creating the forms by hand using a Design View
- Creating a default form based on all of the fields available in a table or a query
- Creating a form based on a number of different wizards that walk the user through the forms creation process.
As with queries, a data entry form can be based on a single table or it can work on multiple tables at the same time.
In this section, we cover the basic steps for using a wizard to create a data entry form based on a single table. After this exercise, a multiple-table form is demonstrated.
7.1 Creating a Single Table Form using the Wizard
In this example, we will create a simple data entry form for the Customer table. To begin the process, click on the Create tab on the Access main screen. As with the other components in Access, there are buttons for creating a New form, Open an existing form and Design an existing form. For this example, click on the New button to create a new form.
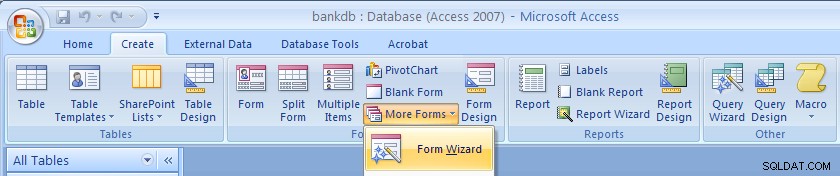
Several buttons for creating a new form will appear. For this tutorial, choose the Form wizard.
In the first step of the Form wizard, we need to specify the fields from the Customer table that will appear on the form. In this case, we want all of the fields to appear. Move each of the fields from the Available Fields side over to the Selected Fields side as in the following figure. Then click on the Next button.

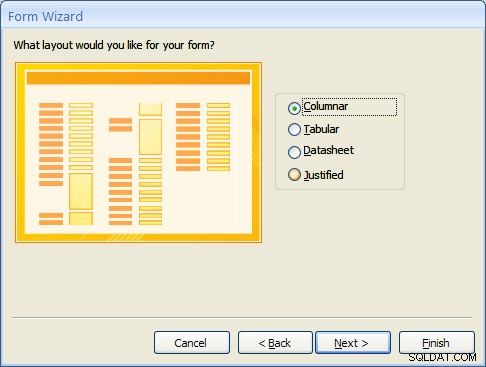
Forms can have several different layouts or arrangement of the labels and fields on the screen.
- Columnar – Places the labels to the left of each field. This is similar to a paper form. This layout is suitable for viewing data one record at a time.
- Tabular – Places the field labels at the top of the screen and the records are displayed below. This is similar to how a spreadsheet would display the data and is suitable for displaying multiple records of data at a time.
- Datasheet – The data appears in the same fashion as when viewing or adding data to a table.
- Justified – Places the labels above each field with the fields spread out on the form. This is suitable for viewing a single record at a time as with the columnar layout.
For this example, choose the columnar layout as shown in the figure below and click on the Next button.
At this point, MS Access 2007 and 2010/2013 versions are a bit different. Access 2007 will show several sample display styles that determine how the form will appear, including elements such as fonts, colors and the background used in the form. Access 2010 and 2013 skips this step in this wizard and provides styles that can be applied to the form in Design mode. For this example, for MS Access 2007, select the Office style as shown below and click on the Next button.

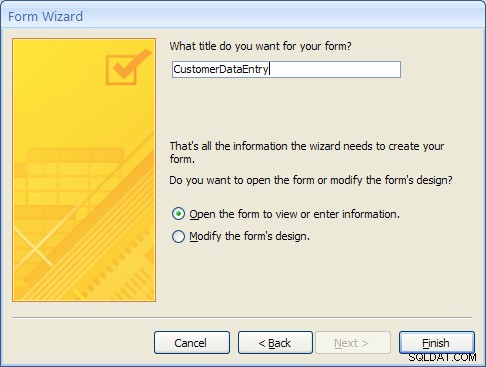
As a final step, give this new form the name:CustomerDataEntry and then click on the Finish button as shown below:
The new form will be created by the wizard and then opened. It should appear as in the figure below:
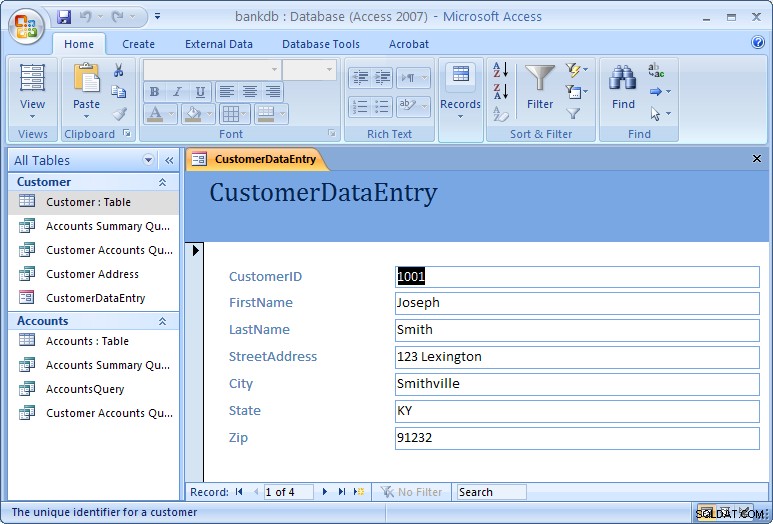
Use the tab key to navigate between fields in the form. To move to the next or previous record, use the record navigation bar at the bottom of the form:
The buttons on the navigation bar perform the following functions:
 | Go to the first record. |
 | Go to the previous record. |
 | Go to the next record. |
 | Go to the last record.  Go past the last record to add a new record. Go past the last record to add a new record. |
To close the form and return to the Access main screen, pull down the File menu and choose Close.
To open the form at any time, highlight the form name under the Forms tab on the Access main screen and click on the Open button.
One quick final note on forms. When the form is created, MS Access looks at how the table is designed and creates the form based on the properties of the table. If you make any changes to the table, you will need to re-create the form again in order to see those table changes reflected in the form. One example where this might happen is is if you change a column in your table from a text box to a combo box, or if you add or remove any columns from your table.
7.2 Exercise:Creating a Single Table Form
For this exercise, we will create a data entry form for the Accounts table created in a previous exercise.
- Click on the Create tab on the Access main screen and then click on the More Forms… button and the “Forms Wizard” to create a new form.
- Select the Accounts table and all of the available fields and click on the Next button.
- Choose a Tabular layout and click on the Next button.
- For Access 2007 choose the Office style and click on the Next button.
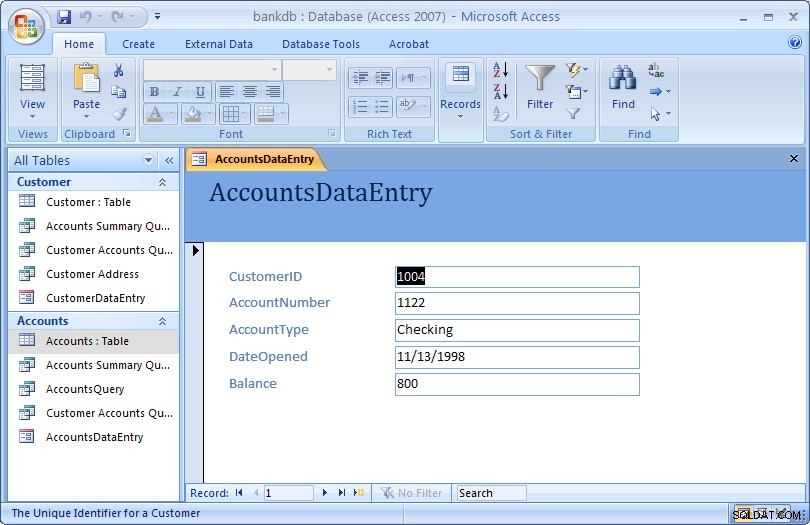
- Name the form:AccountsDataEntry Then click on the Finish button to create, save and view the new form.
The new form is shown in the figure below:
Close the form and return to the Access main screen, by pulling down the File (or Office) menu and choosing Close.
7.3 Review of Creating and Running a Data Entry Form
The basic steps for creating a simple data entry form are:
- Choose a table and a form wizard
- Specify the fields (columns) that will appear in the form
- Specify the layout for the form
- Specify the style (fonts/colors, etc.) for the form
- Save, create and run the new form
In this section we covered the basic steps required to create and run a data entry form. Access provides wizards which are adept at building simple forms with a minimal amount of work. More advanced work on forms would concentrate on using the Design View to change a form’s appearance and to add or remove fields and labels once a form is created. A more advanced tutorial on MS Access Forms Design is linked here.
8 Creating and Running a Report
Reports are similar to queries in that they retrieve data from one or more tables and display the records. Unlike queries, however, reports add formatting to the output including fonts, colors, backgrounds and other features. Reports are often printed out on paper rather than just viewed on the screen. They can also be attached to e-mail and exported and posted as web pages.
As with data entry forms, there are a number of ways to create reports in MS Access:
- A report can be created “by hand” in Design view
- A default report can be created automatically based on all of the firleds for a given table.
- A report can be created using the Create Report wizard.
In this section, we cover how to create simple reports using the Report wizard.
8.1 Creating a Single Table Report using the Wizard
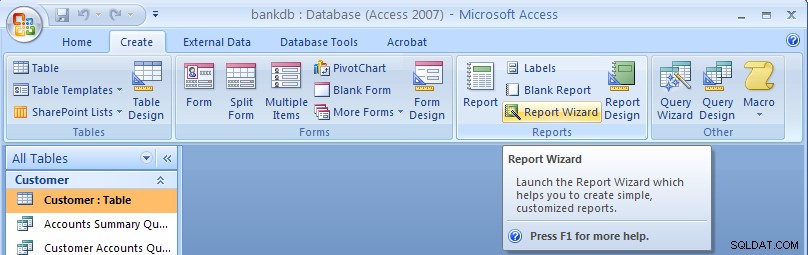
In this example, we will create a simple report for a single table using the Report wizard. As with the Queries and Forms, we begin by selecting the Create tab from the Access main screen.
To create a new report, click on the Report Wizard button.
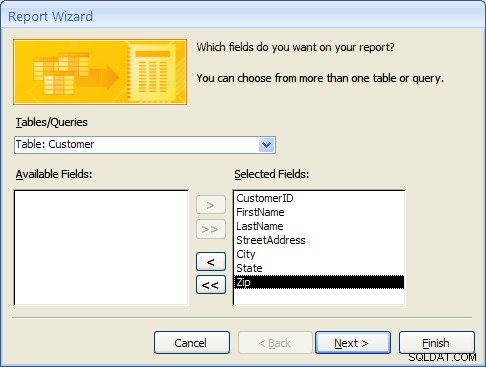
In the next step of the Report wizard, is used to specify the fields from the Customer table that will appear on the report. In this case, we want all of the fields to appear. Move each of the fields from the Available Fields side over to the Selected Fields side as in the following figure. Then click on the Next button.
In the next step, we have the opportunity to add Grouping Levels to the report. A grouping level is where several records have the same value for a given field and we only display the value for the first records. In this case, we will not use any grouping levels so simply click on the Next button as shown below.
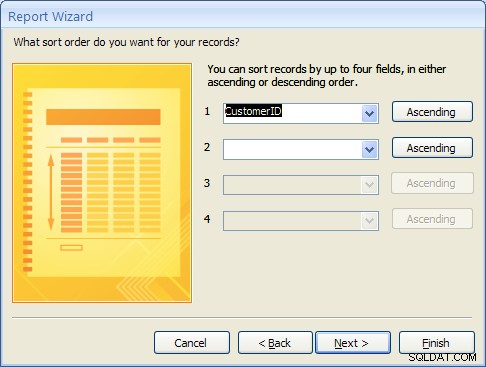
In the next step, the sorting order of the report can be specified. For this example, we will sort the records on the CustomerID field. To achieve this, pull down the list box next to the number 1:and choose the CustomerID field as shown in the figure below. Then click on the Next button.
8.1 Creating a Single Table Report using the Wizard (Continued)
The next step is to specify the layout of the report. The three options are:
- Columnar – Places the labels to the left of each field. This is similar to a paper form.
- Tabular – Places the field labels at the top of the report page and the records are displayed below. This is similar to how a spreadsheet would display the data.
- Justified – Places the labels above each field with the fields spread out on the report page.
Generally, reports use the tabular layout. For this example, choose Tabular layout and set the page Orientation to Landscape so that all of the fields will fit across one page. This is shown in the figure below. Click on the Next button to continue.

In the next step, the style of the report can be selected. For this example, choose the Office style and click on the Next button to continue.

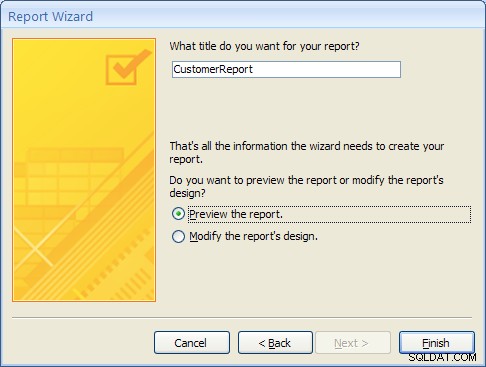
Finally, give a name for the new report:CustomerReport and then click on the Finish button to create, save and display the new report.
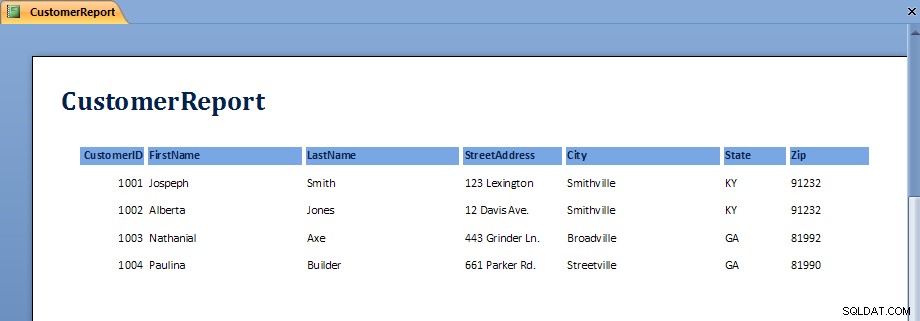
The output from the report is shown in the figure below. Note that on some screens, the last field, Zip, may not display without scrolling over to the right.
Once the report is displayed, it can be viewed, printed or transferred into Microsoft Word or Microsoft Excel. The button bar across the top of the screen has the following functions:
 | Print the report |
 | Zoom into a region of the report |
 | Display the report as one, two or multiple pages |
 | Zoom into or out of the report |
 | Transfer the report into MS Word |
 | Close the report |
To close the report and return to the Access main screen, click on the Close button.
8.2 Exercise:Creating a Single Table Report
For this exercise, we will create a report showing all of the Accounts information.
- From the Access main screen, click on the Create tab and Click on the Report wizard.
- Select all of the fields in the Accounts table by moving them all over to the Selected Fields side and then click Next
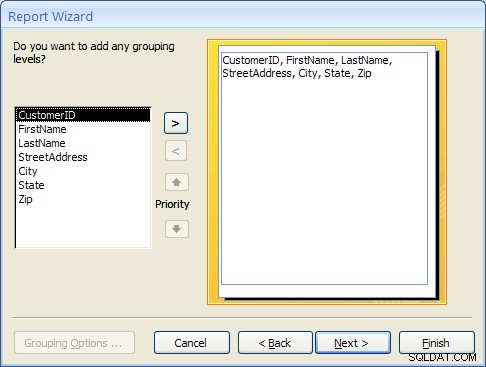
- Group the report by CustomerID by clicking on the CustomerID field and then clicking on the right arrow button. This is shown in the following figure:
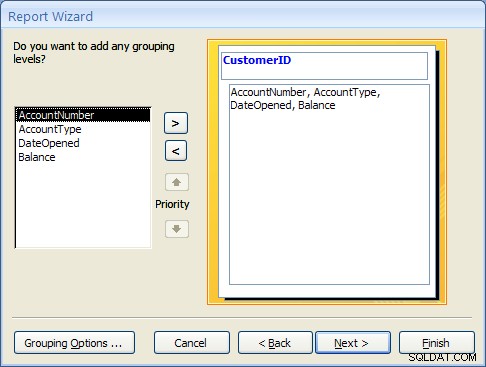
Click on the Next button to continue. - Choose to sort the report on the AccountNumber campo. Note that a new button will appear called Summary Options.
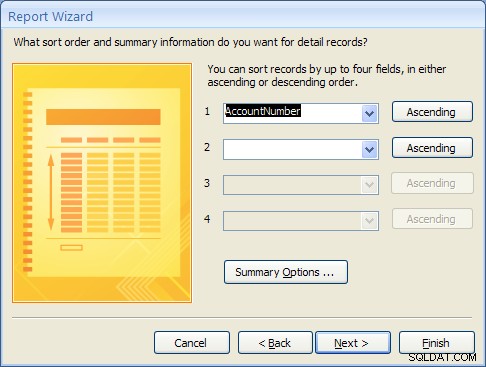
Click on the Summary Options button. Choose the Balance field and select the Sum option. Choose the option to show both Detail and Summary data. Then click on the OK button.

Click on the Next button. - Choose a Block layout and click on the Next button.
- Choose the Corporate style and the click on the Next button.
- Finally, name the report:AccountsReport and click on the Finish button to create, save and run the report.
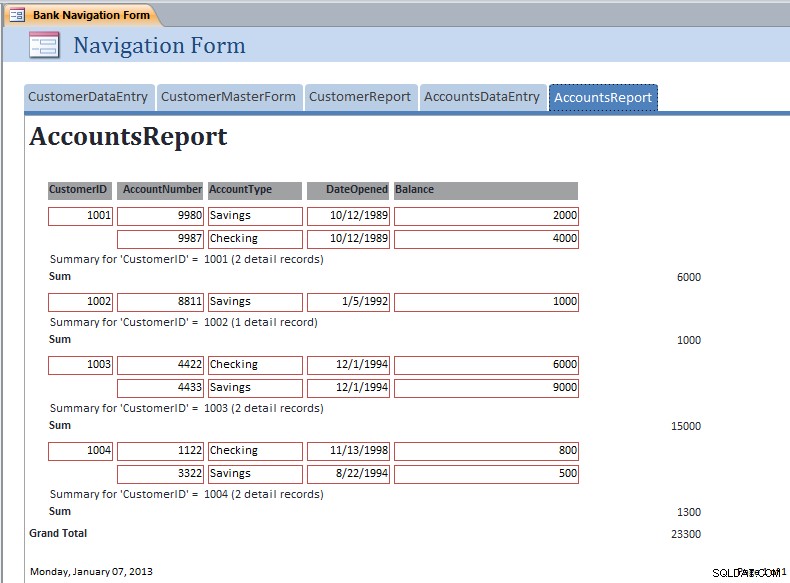
The output from the AccountsReport is shown below:
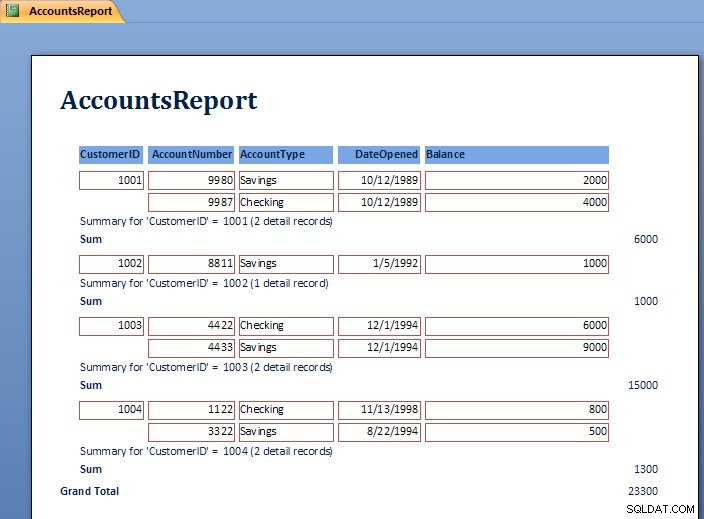
Note the Grouping at the level of the CustomerID and the Sum for each customer’s balances.
To close the report and return to the Access main screen, pull down the File menu and choose Close.
8.3 Review of Creating and Running a Report
As can be seen in the report exercise, there are many ways to create reports to show summation, sorting and layout of the data. Further study of Reports will show how to modify the layout using the Design View. Students are encouraged to work with the Report wizards to create different styles and types of reports.
9 Creating and Running a Master/Detail Form
Master/Detail forms are used to display data from two tables at the same time. MS Access calls the “details” a “subform”. The forms are linked according to the relationship between the tables. Recall that in the example database, the CustomerID is used to link the Customer table (Master) to the Accounts table (Detail). In this section a master / detail form for the Customer and Accounts tables will be created.
- From the Access main screen, click on the Create tab and Click on the “More Forms…” section and finally the “Forms Wizard”.Select the Customer table first and move the CustomerID, FirstName and LastName fields to the Selected Fields list.Next, select the Accounts table and move the AccountNumber, AccountType, DateOpened and Balance fields to the Selected Fields list as shown below.
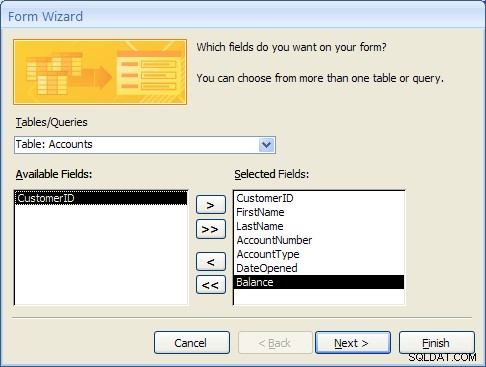
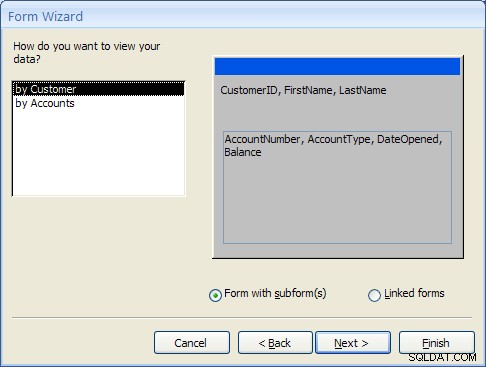
Click the Next… button to move to the next step. - At this point MS Access detects that this form will involve data from two different tables. The first prompt asks how the form should be organized at the top or “Master” level. The “by Customer” selection should be highlighted.The second prompt asks how the forms should be created. For this example, select “Form with Subform(s)” as shown below and click the Next… button to move to the next step.
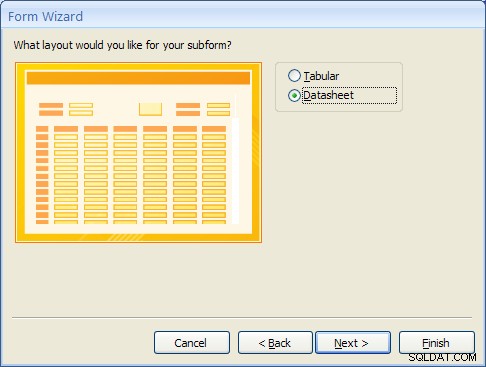
- The Subform is the form that will display the detailed data from the Accounts table. Selecting the “Datasheet” layout will make it easy for the user to view the multiple accounts a Customer may have. Select “Datasheet” and click the Next… button to move to the next step.
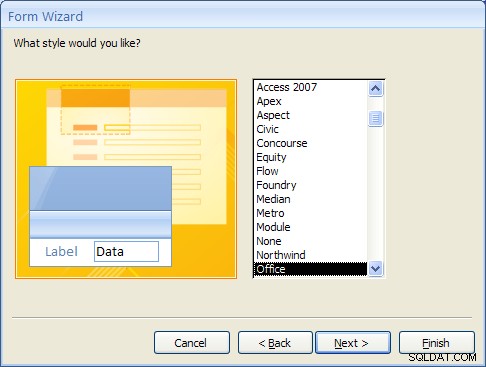
- For Access 2007, select the Office style and click the Next… button to move to the next step. (This step will not appear in MS Access 2010 or 2013).
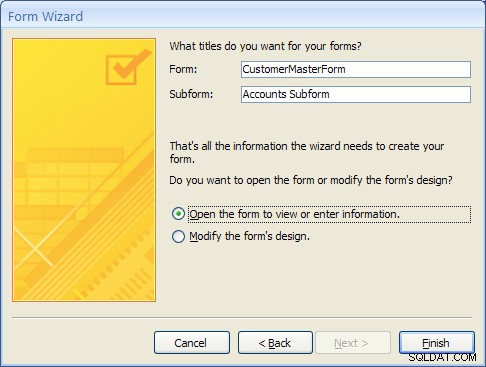
- Finally, give the main form the name “CustomerMasterForm” and the Subform the name “Accounts Subform”.
- After clicking on the Finish button the new Master/Detail form will appear as shown below.
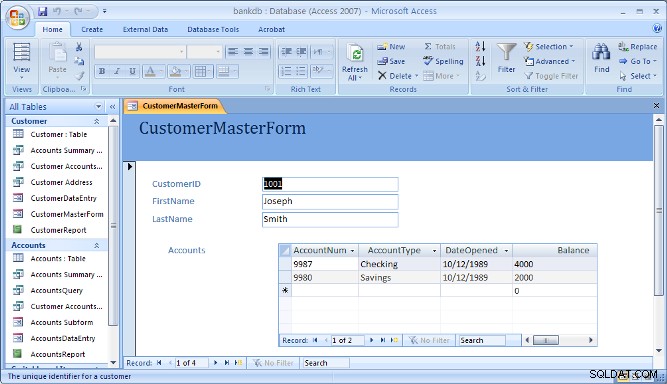
Note that the navigation bar at the bottom of the form is used to navigate through the records in the Master (or top) part of the form.
10 Creating and Running a Switchboard
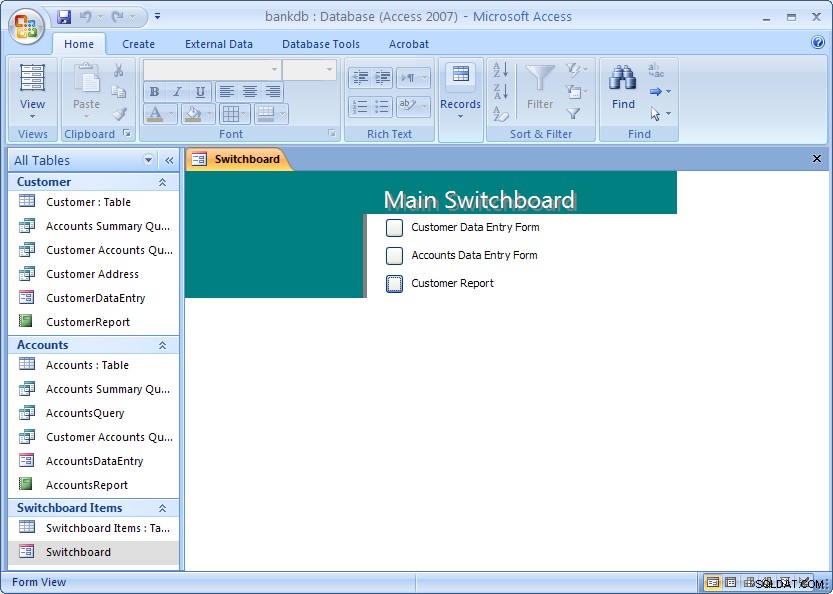
A Switchboard is a type of form that displays a menu of items that a user can click on to launch data entry forms, reports, queries and other actions in the database. A switchboard is typically created after all of the forms and reports for a database application have been completed. It can be used to guide the user to an appropriate set of forms and reports.
Note that starting with Access 2010, Switchboards are not available by default (you will need to add this to the ribbon bar manually using the Options). Access 2010 and 2013 make use of the Navigation Forms.
In this section, a default switchboard will be created.
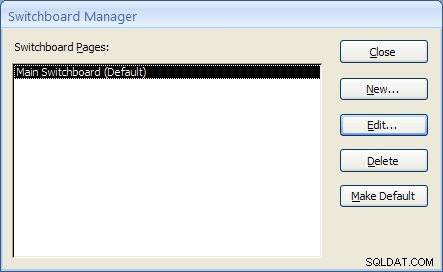
- From the Access main screen, click on the Database Tools tab and Click on the Switchboard Manager as shown in the figure below.

If this is the first switchboard made for this database, you will be prompted to create a new one as shown below. Click the Yes button.

- The Switchboard manager will appear as shown below:
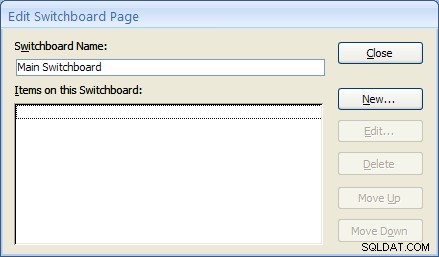
- Click on the Edit menu to edit the “Main Switchboard”. The Edit Switchboard Page will appear as shown below:
- Add a new switchboard item by clicking on the New… button. The Edit Switchboard Item form will appear as shown below. Fill in the fields as follows:
Text: Customer Data Entry Form Command: Select Open Form in Edit Mode from the drop down list. Form: Select the “CustomerDataEntry” form from the drop down list. 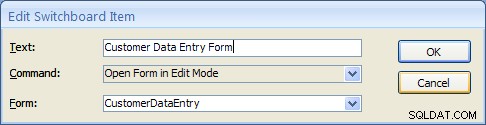
Click on the OK button to save this new Switchboard item.
- Repeat the above step two more times to add Switchboard items for the Accounts DataEntry form and the Customer Report.
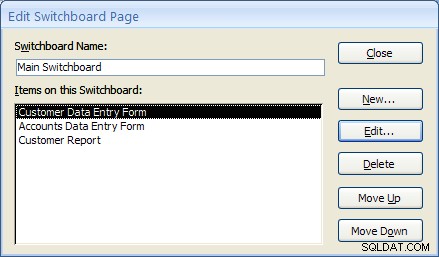
Once completed, click the Close button. Then click the Close button once more to close the Switchboard manager. - From the main MS Access screen look for a new section labeled Switchboard items. To view the switchboard, double-click on name “Switchboard”.
The next section covers creating a Navigation Form which is the recommended navigation screen for MS Access 2007, 2010 and newer versions.
11 Creating and Running a Navigation Form
MS Access 2010 introduced a new form called a Navigation Form. Navigation forms take the place of Switchboards but provide much the same functionality. Namely, they are designed to give the user the ability to run forms and reports without having to hunt through all of the different menus and lists objects. Typically a database application will have one main Navigation form that will appear when the database is opened.
In this section, the basic steps for creating and running a Navigation Form in MS Access 2010 will be demonstrated.
A Navigation Form is another type of form in MS Access 2010 and 2013
- To get started, click on the Create tab on the Access 2010 or 2013 ribbon bar. Under the section for Forms look for the item labeled Navigation Form. Note that this may be located on the button labeled Other Forms.
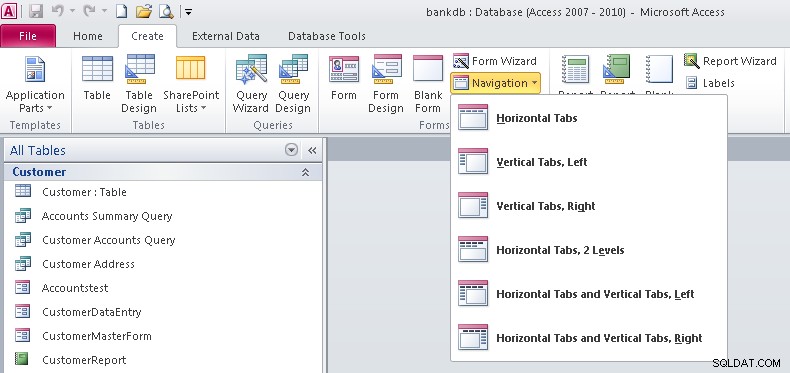
- Note that there are 6 different default styles of Navigation Forms. Each one places the buttons in a different configuration on the screem. Buttons can be aligned across the top, either side or some combination.For this tutorial select the Horizontal Tabs configuration which appears as the first item on the list.
- At this point a new Navigation Form will be created with a row of tabs across the top. The first tab will be labeled [Add New]
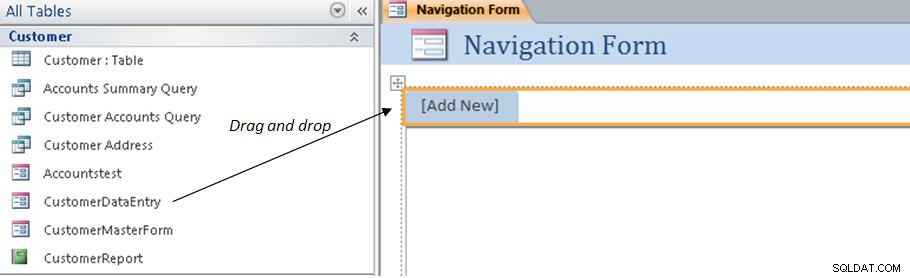
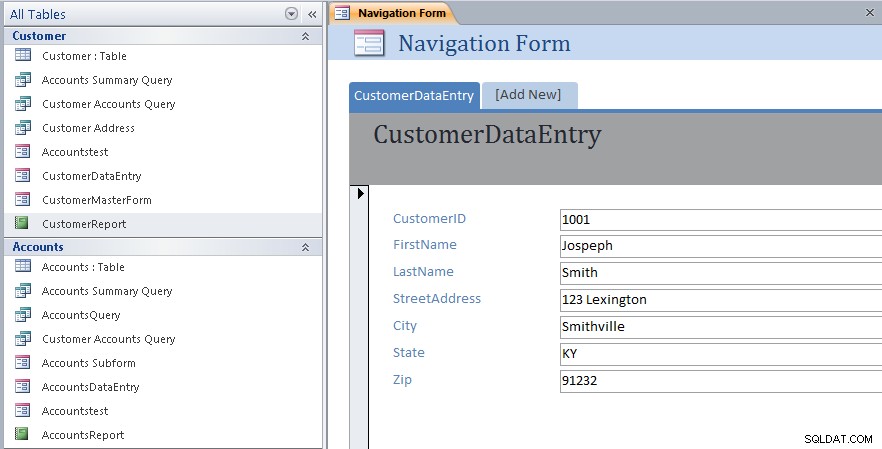
- To add items to the Navigation form, drag the items from the list on the left over to the spot on the Navigation Form labeled [Add New]. This is shown by the arrow in the above figure. For example, drag over the CustomerDataEntry form to the Navigation Form. The result is shown below.
- Next drag and drop the CustomerMasterForm as shown below.

- Next drag and drop the CustomerReport as shown below.
- At this point we have created a new navigation Form and added three items along the top of the page. Save the Navigation Form by right-clicking on the name of the form and choosing Save as shown below:
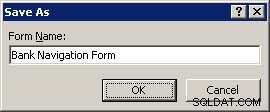
- Name the Navigation Form:Bank Navigation Form and click the OK button.
- Close up the Navigation Form by right-clicking again on the name of the form and choosing Close menu item.At this point the new Navigation Form has been created and saved. The next step will be to view the Navigation Form and navigate the different forms and reports linked to it.
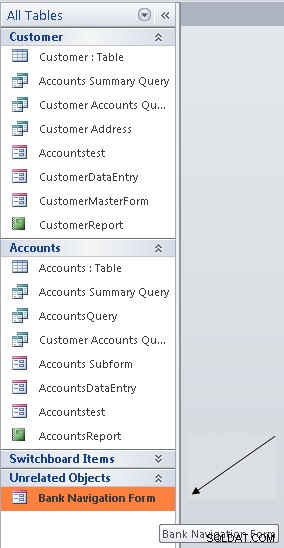
- To view the Navigation Form, look for the Unrelated Objects group on the left side of the screen. Double click on the Bank Navigation Form item as shown below:
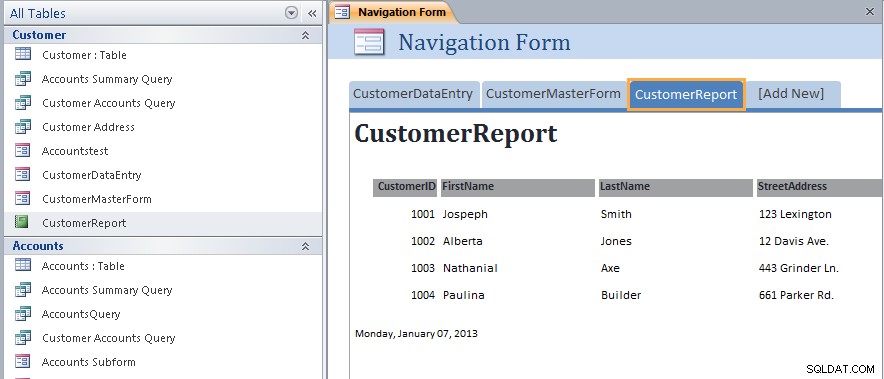
The Navigation Form will appear: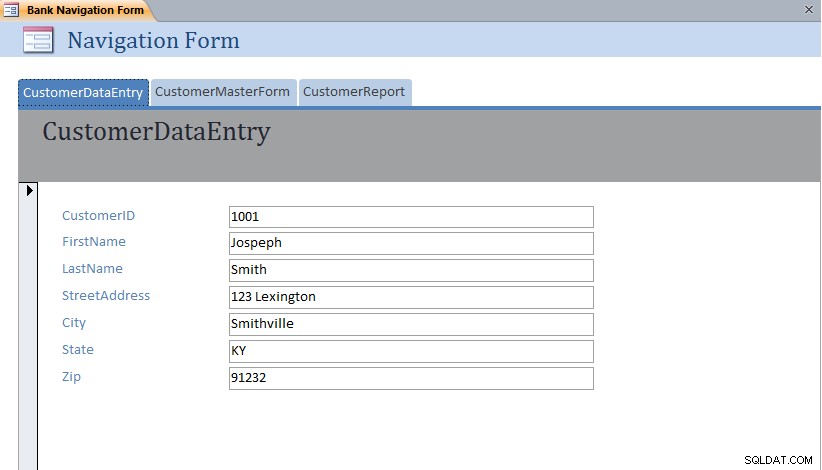 Note that each form or report can be displayed simply by clicking on the different tabs across the top of the Navigation Form.
11.1 Exercise:Modifying a Navigation Form
For this exercise, edit the Bank Navigation Form in Layout View and add the following new items to the Navigation Form:
- AccountsDataEntry
- AccountsReport
The resulting Navigation Form should appear as below with the AccountsReport opened:
11.2 Setting the Navigation Form as the Default
MS Access 2007 and 2010 (as well as earlier versions) have the ability to set a default form that will open up automatically once the MS Access data file is opened. This is especially useful for end users so that they always see the same form when they open up the database.
To set the Default Form, pull down the File menu and select the Options menu item.

The Database Options form will appear. Click on the Current Database item on the left hand side.
Under the Application Options heading, look for the Display Form:prompt and set this to the Bank Navigation Form as shown below:
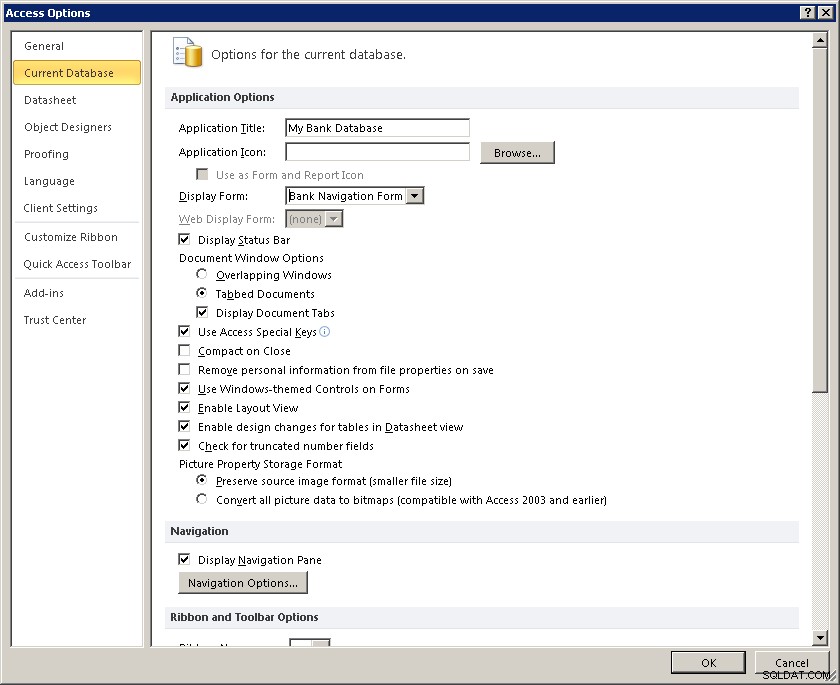
Click on the OK button to close up the Database Options screen.
The next time this database (bankdb.accdb) is opened, the Bank Navigation Form will open up.
12 Tutorial Summary
In this tutorial, we have covered the basics for creating an Access database including tables with data, queries to retrieve data, forms to enter data and reports to display and summarize data.
Students are encouraged to further their Access knowledge and skills by working through more advanced tutorials such as Advanced Access Database Table Design and Advanced Access Forms Design, and by reading the on-line help and Access documentation.
You may also be interested in this tutorial that covers up-sizing the Access database to Microsoft SQL Server using the Microsoft SQL Server Migration Assistant.