In questo articolo, ti mostreremo come creare un'applicazione di chat in tempo reale utilizzando le seguenti tecnologie:
- Redis
- Node.js + Express.js
- Socket.IO
- Heroku
Redis
Redis è un archivio di strutture dati in memoria open source (con licenza BSD), utilizzato come database, cache e broker di messaggi. Supporta strutture di dati come stringhe, hash, elenchi, set, set ordinati con query di intervallo, bitmap, hyperloglog e indici geospaziali con query raggio.
In questo tutorial sull'applicazione, ci collegheremo a uno dei cluster utilizzando l'hosting ScaleGrid per Redis™*.
Node.js
Una piattaforma basata sul runtime JavaScript di Chrome per creare facilmente applicazioni di rete veloci e scalabili. Node.js utilizza un modello I/O non bloccante basato su eventi che lo rende leggero ed efficiente, quindi perfetto per applicazioni in tempo reale ad alta intensità di dati che girano su dispositivi distribuiti.
Express.js
Un framework Node.js. Node.js è una piattaforma che consente di utilizzare JavaScript al di fuori dei browser Web per la creazione di applicazioni Web e di rete. Ciò significa che puoi creare il server e il codice lato server per un'applicazione come la maggior parte degli altri linguaggi web, ma utilizzando JavaScript.
Socket.IO
Una libreria JavaScript per applicazioni Web in tempo reale che consente la comunicazione bidirezionale in tempo reale tra client Web e server. Socket.IO ha due componenti:una libreria lato client che viene eseguita nel browser e una libreria lato server per Node.js. Entrambi i componenti hanno API quasi identiche.
Heroku
Una piattaforma cloud che consente alle aziende di creare, distribuire, monitorare e ridimensionare le app. La piattaforma Heroku è il modo più veloce per passare dall'idea all'URL, aggirando tutti quei grattacapi infrastrutturali.
Questo articolo presuppone che Redis, Node.js e Heroku Toolbelt siano già installati sulla tua macchina.
Configurazione
Crea una cartella e assegnagli un nome. Puoi crearlo ovunque sulla tua macchina poiché Node.js non ha bisogno di un server speciale come Apache/nginx.
Fase 1
Inizializza un file package.json eseguendo npm init .
{
  "name": "node-socket-redis-chat-scalegrid",
  "version": "0.0.1",
  "description": "A realtime chat application using Redis, Node.js and Socket.IO",
  "dependencies": {
    "body-parser": "^1.15.2",
    "express": "^4.10.2",
    "redis": "^2.6.3",
    "socket.io": "^1.7.1"
  },
  "main": "index.js",
  "scripts": {
    "start": "node index.js"
  },
  "engines": {
    "node": "4.1.1"
  }
}
Fase 2
Installa le seguenti dipendenze:
- espressi
- presa
- ridi
...e altri metodi di utilità:
- analizzatore di corpi
eseguendo il comando seguente:
npm install --save expressjs socket.io redis body-parser
Fase 3
Crea una cartella pubblica per archiviare i nostri file CSS e JS:
/public/css/main.css
/public/js/main.js
Fase 4:
Crea una cartella delle viste per memorizzare il nostro file HTML principale:
/views/index.html
Fase 5:
Crea un creds.json file che conterrà le credenziali per la connessione al nostro Redis™ Cluster. Dovrebbe seguire il seguente formato:
{
    "user": "",
    "password": "",
    "host": "",
    "port": 6379
}
Fase 6:
Crea il index.js file che ospiterà il nostro codice Node.js e servirà come punto di partenza per Heroku.
Passo 7:
Aggiungi un .gitignore file in modo che la cartella node_modules non sia archiviata in Heroku:
node_modules
Dopo aver completato il settimo passaggio, dovresti avere la seguente struttura:
.
├── creds.json
├── index.js
├── package.json
├── public
│   ├── css
│   │   └── main.css
│   └── js
│       └── main.js
└── views
    └── index.html
Fase 8
Ora che tutto è impostato, possiamo iniziare a scrivere il nostro codice di backend. Prima di tutto, dobbiamo inserire tutti i nostri moduli. Quindi, apri il file index.js e incolla quanto segue:
var express = require('express');
var bodyParser = require('body-parser');
var app = express();
var http = require('http').Server(app);
var io = require('socket.io')(http);

var fs = require('fs');
var creds = '';

var redis = require('redis');
var client = '';
var port = process.env.PORT || 8080;

// Express Middleware for serving static
// files and parsing the request body
app.use(express.static('public'));
app.use(bodyParser.urlencoded({
    extended: true
}));

// Start the Server
http.listen(port, function() {
    console.log('Server Started. Listening on *:' + port);
});

// Store people in chatroom
var chatters = [];

// Store messages in chatroom
var chat_messages = [];
Prima di poter iniziare a scrivere qualsiasi codice, abbiamo bisogno di un cluster che esegua Redis. Fortunatamente, ScaleGrid for Redis™ offre una soluzione di hosting ad alte prestazioni, con un clic e completamente gestita.
Se non sei già un membro, puoi registrarti per una prova gratuita di 30 giorni qui.
Altrimenti, accedi alla dashboard e crea un nuovo cluster Redis™ nella sezione Redis™:

Una volta completata la creazione del cluster, prendi nota delle informazioni di cui sopra e aggiungile ai campi pertinenti di creds.json file.
Ora che abbiamo impostato le nostre credenziali, siamo pronti per creare il nostro client Redis in Node che si connetterà al nostro cluster e inizierà a memorizzare coppie chiave-valore.
Aggiungi il seguente codice al file index.js:
// Read credentials from JSON
fs.readFile('creds.json', 'utf-8', function(err, data) {
    if(err) throw err;
    creds = JSON.parse(data);
    client = redis.createClient('redis://' + creds.user + ':' + creds.password + '@' + creds.host + ':' + creds.port);

    // Redis Client Ready
    client.once('ready', function() {

        // Flush Redis DB
        // client.flushdb();

        // Initialize Chatters
        client.get('chat_users', function(err, reply) {
            if (reply) {
                chatters = JSON.parse(reply);
            }
        });

        // Initialize Messages
        client.get('chat_app_messages', function(err, reply) {
            if (reply) {
                chat_messages = JSON.parse(reply);
            }
        });
    });
});
Il codice sopra fa due cose:
- Legge le credenziali da
creds.jsone crea un client Redis che viene utilizzato per eseguire operazioni chiave-valore - Una volta che il client è pronto, popoliamo i
chatterse ichat_messagescosì tutti i nuovi membri che si uniranno potranno vedere la cronologia della chat.
Scriveremo ora un paio di API per gestire l'applicazione di chat. Abbiamo bisogno delle seguenti API:
- Unisciti alla stanza [POST]
- Lascia la stanza [POST]
- Invia messaggio [POST]
- Ricevi messaggi [GET]
- Ottieni membri [OTTIENI]
Iniziamo con l'API Join Room. Viene chiamato quando un nuovo utente avvia per la prima volta l'applicazione e tenta di entrare nella chat room:
// API - Join Chat
app.post('/join', function(req, res) {
    var username = req.body.username;
    if (chatters.indexOf(username) === -1) {
        chatters.push(username);
        client.set('chat_users', JSON.stringify(chatters));
        res.send({
            'chatters': chatters,
            'status': 'OK'
        });
    } else {
        res.send({
            'status': 'FAILED'
        });
    }
});
Qui abbiamo l'API per uscire dalla chat room:
// API - Leave Chat
app.post('/leave', function(req, res) {
    var username = req.body.username;
    chatters.splice(chatters.indexOf(username), 1);
    client.set('chat_users', JSON.stringify(chatters));
    res.send({
        'status': 'OK'
    });
});
Invio e memorizzazione del messaggio:
// API - Send + Store Message
app.post('/send_message', function(req, res) {
    var username = req.body.username;
    var message = req.body.message;
    chat_messages.push({
        'sender': username,
        'message': message
    });
    client.set('chat_app_messages', JSON.stringify(chat_messages));
    res.send({
        'status': 'OK'
    });
});
Ricevi tutti i messaggi nella stanza virtuale:
// API - Get Messages
app.get('/get_messages', function(req, res) {
    res.send(chat_messages);
});
Ottieni tutti i membri:
// API - Get Chatters
app.get('/get_chatters', function(req, res) {
    res.send(chatters);
});
Una volta configurate tutte le API, è necessario scrivere il codice Socket.IO per emettere eventi quando determinate proprietà come le seguenti vengono aggiornate:
- Conteggio stanze
- Messaggi
// Socket Connection
// UI Stuff
io.on('connection', function(socket) {

    // Fire 'send' event for updating Message list in UI
    socket.on('message', function(data) {
        io.emit('send', data);
    });

    // Fire 'count_chatters' for updating Chatter Count in UI
    socket.on('update_chatter_count', function(data) {
        io.emit('count_chatters', data);
    });

});
Questi eventi vengono quindi rilevati sul front-end dalla libreria Socket.IO, che a sua volta aggiorna l'interfaccia utente.
Fase 9
Ora dobbiamo creare la nostra interfaccia utente che consentirà agli utenti di accedere e chattare.
Apri index.html file e aggiungi il seguente codice:
<!doctype html>
<html lang="en">
<head>
<meta charset="UTF-8">
<title>Node.js + Socket.io + Redis Chat | ScaleGrid</title>
<link rel="stylesheet" href="css/main.css">
</head>
<body>
<div class="container">
<h1>Node.js + Socket.io + Redis Chat | ScaleGrid</h1>
<div class="join-chat">
<label for="username">Username:</label>
<input type="text" id="username" name="username" />
<input type="button" id="join-chat" value="Join Chat" />
</div><br />
<div class="chat-info"></div><br />
<div class="chat">
<div class="messages"></div>
<textarea name="message" id="message" cols="90" rows="5" placeholder="Enter your message..."></textarea><br /><br />
<input type="button" id="send-message" data-username="" value="Send Message">
<input type="button" id="leave-chat" data-username="" value="Leave Chat">
</div>
</div>
<script src="https://cdnjs.cloudflare.com/ajax/libs/socket.io/1.6.0/socket.io.min.js"></script>
<script src="https://cdnjs.cloudflare.com/ajax/libs/jquery/3.1.1/jquery.min.js"></script>
<script src="js/main.js"></script>
</body>
</html>
Fase 10
Per far funzionare il nostro HTML, dobbiamo aggiungere alcuni eventi JavaScript AJAX che gestiranno le varie operazioni come entrare in una stanza, uscire, inviare un messaggio ecc.
Il codice seguente ottiene il numero di chiacchiere in modo da poter aggiornare l'interfaccia utente sul numero totale di persone nella stanza:
$.get('/get_chatters', function(response) {
    $('.chat-info').text("There are currently " + response.length + " people in the chat room");
    chatter_count = response.length; //update chatter count
});
Questo codice consente agli utenti di entrare nella chat room. Ricorda, i nomi utente sono univoci e non possono essere duplicati:
$('#join-chat').click(function() {
    var username = $.trim($('#username').val());
    $.ajax({
        url: '/join',
        type: 'POST',
        data: {
            username: username
        },
        success: function(response) {
            if (response.status == 'OK') { //username doesn't already exists
                socket.emit('update_chatter_count', {
                    'action': 'increase'
                });
                $('.chat').show();
                $('#leave-chat').data('username', username);
                $('#send-message').data('username', username);
                $.get('/get_messages', function(response) {
                    if (response.length > 0) {
                        var message_count = response.length;
                        var html = '';
                        for (var x = 0; x < message_count; x++) {
                            html += "<div class='msg'><div class='user'>" + response[x]['sender'] + "</div><div class='txt'>" + response[x]['message'] + "</div></div>";
                        }
                        $('.messages').html(html);
                    }
                });
                $('.join-chat').hide(); //hide the container for joining the chat room.
            } else if (response.status == 'FAILED') { //username already exists
                alert("Sorry but the username already exists, please choose another one");
                $('#username').val('').focus();
            }
        }
    });
});
Ecco il codice per consentire agli utenti di lasciare la chat room:
$('#leave-chat').click(function() {
    var username = $(this).data('username');
    $.ajax({
        url: '/leave',
        type: 'POST',
        dataType: 'json',
        data: {
            username: username
        },
        success: function(response) {
            if (response.status == 'OK') {
                socket.emit('message', {
                    'username': username,
                    'message': username + " has left the chat room.."
                });
                socket.emit('update_chatter_count', {
                    'action': 'decrease'
                });
                $('.chat').hide();
                $('.join-chat').show();
                $('#username').val('');
                alert('You have successfully left the chat room');
            }
        }
    });
});
Ecco il codice che viene eseguito ogni volta che qualcuno invia un messaggio:
$('#send-message').click(function() {
    var username = $(this).data('username');
    var message = $.trim($('#message').val());
    $.ajax({
        url: '/send_message',
        type: 'POST',
        dataType: 'json',
        data: {
            'username': username,
            'message': message
        },
        success: function(response) {
            if (response.status == 'OK') {
                socket.emit('message', {
                    'username': username,
                    'message': message
                });
                $('#message').val('');
            }
        }
    });
});
Quello che segue è il codice Socket.IO che ascolta gli eventi dal back-end e aggiorna l'interfaccia utente. Ad esempio, aggiungere nuovi messaggi all'area messaggi, aggiornare il conteggio delle chiacchiere, ecc.:
socket.on('send', function(data) {
    var username = data.username;
    var message = data.message;
    var html = "<div class='msg'><div class='user'>" + username + "</div><div class='txt'>" + message + "</div></div>";
    $('.messages').append(html);
});
socket.on('count_chatters', function(data) {
    if (data.action == 'increase') {
        chatter_count++;
    } else {
        chatter_count--;
    }
    $('.chat-info').text("There are currently " + chatter_count + " people in the chat room");
});
E il gioco è fatto! Avvia il server usando npm start e apri più finestre del browser per simulare più utenti.
Una demo dell'applicazione è disponibile qui: https://node-socket-redis-chat.herokuapp.com/
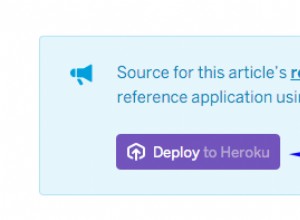
Per distribuire questa applicazione su Heroku, controlla i loro documenti: https://devcenter.heroku.com/categories/deployment
L'intero codice sorgente è disponibile anche su GitHub per il fork e lavorare su: https://github.com/Scalegrid/code-samples/tree/sg-redis- node-socket-chat/redis-node-socket-chat
Come sempre, se costruisci qualcosa di fantastico, twittaci a riguardo @scalegridio.
Se hai bisogno di aiuto con la gestione e l'hosting per Redis™, ti semplifichiamo le cose con i nostri servizi professionali.