In questo post ti fornirò uno script e un database molto utili per i tuoi progetti, tutti ne hanno bisogno quando le persone hanno lavorato a qualsiasi progetto basato sulla spedizione e altri progetti basati sulla posta.
Quindi qui ti mostrerò come creare uno script di localizzazione molto semplice tramite codice pin usando php, jquery e mysql.
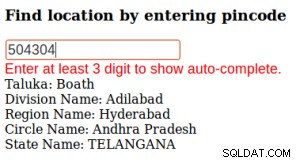
Puoi anche scarica il database di codici pin/codice postale/codice postale dell'India gratuitamente da qui.
| DEMO | SCARICA |
Iniziamo il tutorial.
Crea database e tabella.
CREATE TABLE IF NOT EXISTS `pincodes` ( `id` int(11) NOT NULL AUTO_INCREMENT, `pincode` varchar(50) DEFAULT NULL, `divisionname` varchar(100) DEFAULT NULL, `egionname` varchar(100) DEFAULT NULL, `circlename` varchar(100) DEFAULT NULL, `taluk` varchar(100) DEFAULT NULL, `districtname` varchar(100) DEFAULT NULL, `statename` varchar(100) DEFAULT NULL, PRIMARY KEY (`id`) ) ENGINE=MyISAM DEFAULT CHARSET=latin1; |
Crea un file html in cui inserirai tutto il codice a livello dell'interfaccia utente.
Qui ho usato il plug-in di completamento automatico jquery-ui, puoi fare riferimento a questo tutorial per creare funzionalità di completamento automatico/suggestimento automatico per il tuo sito Web:http ://www.iamrohit.in/simple-auto-suggest-example-using-php-jquery-and-mysql/
indice.html
<!doctype html>
<html lang="en">
<head>
  <meta charset="utf-8">
  <title>Simple location locator by pincode</title>
  <link rel="stylesheet" href="http://code.jquery.com/ui/1.11.4/themes/smoothness/jquery-ui.css">
 <style>
  .ui-autocomplete-loading {
    background: white url("img/ui-anim_basic_16x16.gif") right center no-repeat;
  }
   .ui-autocomplete {
    max-height: 300px;
    overflow-y: auto;
    /* prevent horizontal scrollbar */
    overflow-x: hidden;
  }
  /* IE 6 doesn't support max-height
   * we use height instead, but this forces the menu to always be this tall
   */
  * html .ui-autocomplete {
    height: 100px;
  }
  </style>


</head>
<body>
<h3>Find location by entering pincode</h3>
    <div class="ui-widget">
  <input type="text" id="country" name="country" placeholder="Enter pincode" width="40%"><br/>
  <span style="color:red;"> Enter at least 3 digit to show auto-complete.
</div>
<div> Taluka: <span id="taluka"></span><br/>
 Division Name: <span id="divison"></span><br/>
  Region Name: <span id="reg"></span><br/>
  Circle Name: <span id="cir"></span><br/>
   State Name: <span id="state"></span><br/>
</div>
  <script src="http://code.jquery.com/jquery-1.10.2.js"></script>
  <script src="http://code.jquery.com/ui/1.11.4/jquery-ui.js"></script>
  <script>
  $(function() {
   $( "#country" ).autocomplete({
      source: function( request, response ) {
        $.ajax({
          url: "request.php",
          dataType: "json",
          data: {
            q: request.term
          },
          success: function( data ) {
            response( data );
          }
        });
      },
      minLength: 3,  // Set minum input length
      select: function( event, ui ) {
            //do something on select event
            var vl = ui.item.id;
            var data = vl.split("-");
            console.log(data);
            $("#taluka").html(data[3]);
            $("#divison").html(data[0]);
            $("#reg").html(data[1]);
            $("#cir").html(data[2]);
            $("#state").html(data[4]);
        //console.log(ui.item); // ui.item is  responded json from server
      },
      open: function() {
                 // D0 something on open event.
      },
      close: function() {
               // Do omething on close event
      }
    });
  });
  </script>
</body>
</html> |
Ora è il momento di creare un file del server che preleverà i dati del codice pin dal tuo database mysql e ti darà l'output desiderato, puoi modificare questo file in base alle tue necessità.
richiesta.php
<?php
// Remove blow comments from header If  you are making calls from another server
/*
header("Access-Control-Allow-Origin: *");
*/

header('Content-Type: application/json');
error_reporting(0);
//ini_set('display_errors',1);
$hostname = "localhost";
$username = "root";
$password = "root";
$dbname = "pincodes";
$q = $_GET['q'];
if(isset($q) || !empty($q)) {
    $con = mysqli_connect($hostname, $username, $password, $dbname);
    $query = "SELECT * FROM pincodes WHERE pincode LIKE '$q%'";
    $result = mysqli_query($con, $query);
    $res = array();
    while($resultSet = mysqli_fetch_assoc($result)) {
     $res[$resultSet['id']]['id'] =  $resultSet['divisionname']."-".$resultSet['egionname']."-".$resultSet['circlename']."-".$resultSet['taluk']."-".$resultSet['statename'];
     $res[$resultSet['id']]['value'] =  $resultSet['pincode'];
    $res[$resultSet['id']]['label'] =  $resultSet['pincode'];

    }
    if(!$res) {
        $res[0] = 'Not found!';
    }
    echo json_encode($res);
}

?> |
La struttura della tua directory sarà
+--img ---index.php ---request.php |
Se hai eseguito correttamente tutti i passaggi, premi l'URL sul browser e guarda la demo.
| DEMO | SCARICA |

